


8-16 Installation and Troubleshooting Guide
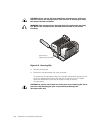
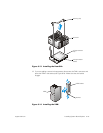
13. Connect the FAN1 connector.
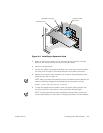
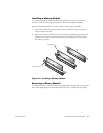
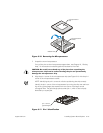
14. Replace the air shroud.
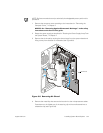
15. Replace the computer cover making sure that the shroud support holds the
shroud in place.
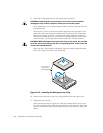
16. Reconnect your computer and peripherals to their power sources, and turn them
on.
17. Press <
F2
> to enter the System Setup program, and check that the
PROCESSOR 1
and
PROCESSOR 2
categories match the new system configuration.
See the system
User’s Guide
for instructions.
18. As the system boots, it detects the presence of the new processor and automat-
ically changes the system configuration information in the System Setup
program. If you installed a second microprocessor, the following message is
displayed:
Two 800 MHZ Processors, Processor Bus: 133 MHz, L2 cache
256 KB Advanced
If only one processor is installed, the following message is displayed:
One 800 MHz Processor, Processor Bus: 133 MHz, L2 cache
256 KB Advanced
NOTE: After you remove and replace the cover, the chassis intrusion detector will
cause the following message to be displayed at the next system start-up:
ALERT! Cover was previously removed.
19. Enter the System Setup program, and confirm that the top line in the system data
area correctly identifies the installed processor(s). See "Using the System Setup
Program" in your
User's Guide
.
20. While in the System Setup program, reset the chassis intrusion detector.
NOTE: If a setup password has been assigned by someone else, contact your
network administrator for information on resetting the chassis intrusion detector.
21. Run the Dell Diagnostics to verify that the new microprocessor is operating cor-
rectly. See Chapter 5, ”Running the Dell Diagnostics,” for information on running
the diagnostics and troubleshooting any problems that may occur.
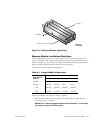
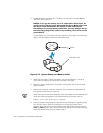
A 3.0-V CR2032 coin-cell battery installed on the system board maintains system con-
figuration, date, and time information in a special section of memory.