


100 Adding and Replacing Parts
www.dell.com | support.dell.com
3
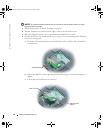
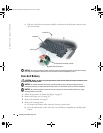
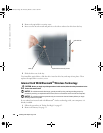
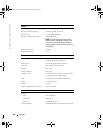
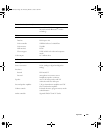
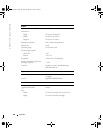
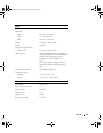
Remove the optical-drive security screw.
4
Insert a scribe into the notch and push it to the side to release the drive from the bay.
5
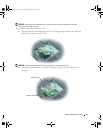
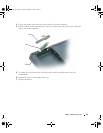
Slide the drive out of the bay.
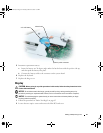
To reinstall the optical drive, slide the drive into the drive bay and snap it into place. Then
replace the optical-drive security screw.
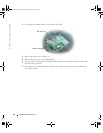
Internal Card With Bluetooth
®
Wireless Technology
CAUTION: Before you begin any of the procedures in this section, follow the safety instructions in the
Product Information Guide.
NOTICE: To avoid electrostatic discharge, ground yourself by using a wrist grounding strap or by
periodically touching an unpainted metal surface (such as a connector on the back of the computer).
NOTICE: To avoid damaging the system board, you must remove the main battery before you begin
working inside the computer.
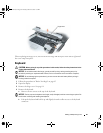
If you ordered an internal card with Bluetooth
®
wireless technology with your computer, it is
already installed.
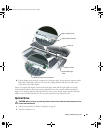
1
Follow the procedures in "Before You Begin" on page 83.
2
Remove the battery. See page 33.
optical-drive security screw
optical drive
notch
G8011bk2.book Page 100 Thursday, March 31, 2005 1:50 PM