


10
2. Equipment connection and network setting
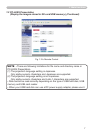
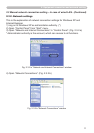
4) Click “One-Click” button in g. 2.2.a. Projector is found. Then capture start
button is pushed and real time display is started automatically.
2.2 Network connection using “One-Click-Communication” function
(Continued)
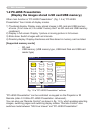
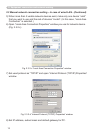
[Wireless LAN connection]
1) When projector network settings such as IP address and subnet mask are
changed, need to return to the projector factory default settings. (
9)
2) In case 802.11b/g wireless LAN device is built-in the PC, make the LAN valid
and other network connections invalid. If wireless LAN device is not built in the
PC, connect 802.11b/g wireless LAN device and install device driver to the PC.
(Refer to the user guide for wireless LAN device details.)
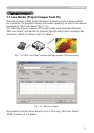
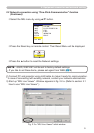
3) Start up “MIU Live Viewer”, then the window appears (shown in g. 2.2.a).
4) Click “One-Click” button as shown in g. 2.2.a. Then projector will be found
and the capture start button is activated then real time display is started
automatically.
When you need to set the original IP address and SSID other than factory default
settings, need to set up network connection manually.
This section explains how to set up network connection manually.
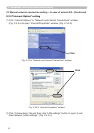
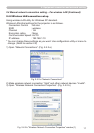
2.3 Manual network connection setting – Wired LAN -
At rst, connecting projector and PC with wired LAN connection to check PC
setting and connection. Next section explains PC settings.
Connecting projector with network using LAN cable, and then set it ready to
communicate with PC.
* Connecting with existing network, contact network administrator.
At last, turn on the projector. This is the end of Equipments connection.
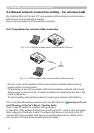
2.3.1. Equipments connection