


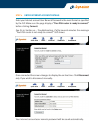


Enter your Internet account user name and password. Go Next.
The new configuration is displayed. Click Apply to confirm changes. The router
will restart itself to activate the new setting.
You will notice all NAT or firewall settings disappear from the Advanced menu
hereafter. Now follow Step 2 of Section 5 – Getting On-line.
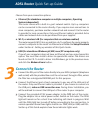
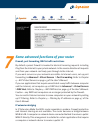
Quality of Service (QoS)
The router allows prioritising of upstream traffic (to the Internet) by allowing the
user to overwrite the Type of Service (TOS) field in the IP datagram header. TOS
parameters such as Precedence, Delay, Throughput & Reliability are described
in the RFC791 Internet Protocol specification.
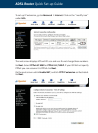
The user specifies the traffic conditions and traffic rules. The router has three
queues for traffic priority: high, medium and low. Low priority packets are not
sent when there are higher priority queues. When QoS is enabled a received
packet has the TOS field in its header overwritten by the traffic rule, subject to
traffic conditions are met.
The router supports both Bridge (layer 2) and IP (layer 3) QoS. The difference is
how traffic conditions can be set. With Bridge QoS, IEEE 802.1p priorities are
used as conditions for a traffic rule to apply. With IP QoS, it is the IP criteria
defined by the user that determines the rule to apply.
Please refer to the User’s Manual for other advanced functions. Always restart
the router to activate any changes to configuration.
Setting up wireless
A full description on this topic is found on Chapter 4 – Wireless on pages 51-59
of the User’s Manual.
Wireless support is activated by default. The WLAN light comes on indicating the
wireless link is ready. The router supports both 802.11g and 802.11b wireless
standards. For indoor operations, typical ranges of operation are 20m and 60m
respectively.
Wireless security features are disabled for ease of install. It is essential to have
some form of wireless security enabled after you have verified that wireless
stations can communicate with the router. To the minimum, have Access Control
enabled to deny access from unwanted wireless stations.
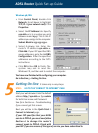
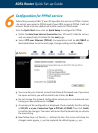
Setup procedure
1. Connect the router via the Ethernet port from any computer to configure for
wireless operation. Start your web browser. Enter the router’s IP address
8