


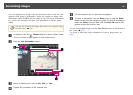


Operation Problems
No image appears on the screen
• After you press the [
t] Power button, wait a few moments for the
image to appear. It takes about 20 seconds for the document camera to
output an image.
• Make sure your projector is connected.
s p.19
If you're connecting it through a computer, see p.21.
• If you've connected a laptop, see "Problems Connecting a Laptop"
p.65.
• The document camera may be set to display an image from your
computer. Press the [Source] - [
] button on the document camera or
remote control to display the live camera image.
• Select the correct source on your projector. The source refers to the
port on the projector to which you've connected the video cable. If
you're using a VGA cable, the source may be called something like
"Computer" or "PC".
• Make sure your projector is turned on and not in sleep mode. Make
sure its picture has not been "muted" or turned off.
• If you made a USB connection, the document camera's USB Mode
setting may be set to Mass Storage.
You need to change this setting to Application. First disconnect the
USB cable, then reconnect to the projector using a VGA cable,
composite video cable, or HDMI cable. Press the [Menu] button and
select Function > USB Mode, then change the setting to Application.
Now you can use the USB cable to display the image.
Image Quality Problems
The image is fuzzy or out of focus
• The document camera needs hard edges or sharp lines in the image to
be able to focus properly. If the image has only soft edges, try placing a
different document under the camera lens while adjusting the focus. Or
focus the image manually with the Focus adjustment in the Image
menu.
s
p.47
• Make sure the lens is at least 10 cm (4 inches) away from the object
you're viewing.
• If you're using a projector to display the image, check its focus.
The image brightness or color isn't correct
• To illuminate your document, slide the lamp switch on the side of the
camera head.
• Press the [
] or [ ] button to increase or decrease image brightness.
• Set the White Balance setting to Auto to adjust the color automatically.
s p.47
If the color is still not correct, choose the setting for the type of
lighting you're presenting under (Cloudy, Daylight, Fluorescent, or
Incandescent).
• If the document camera was used with a microscope, be sure to turn
the Microscope setting off when you return to displaying ordinary
documents.
s p.47
Other image problems
• If the image is stretched or has black bars, you may need to change the
Output Resolution in the Function menu.
a
If you think some settings may have been changed, you can use the
Reset option to return all the image settings back to their standard
values except the Output Resolution setting. s p.47
Problems and Solutions
64