


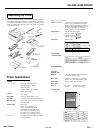


EPL-6000 LASER PRINTER
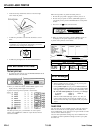
To take advantage of HP emulation, simply choose a printer driver
from the list below. They are listed in order of priority.
HP LaserJet series II
HP LaserJet
Plusm
HP
LaserJetTU
The application program’s menu may list a number of more specific
choices corresponding to various HP LaserJet font cartridges. (The
choices are labeled with capital letters, such as A, B, or C.)
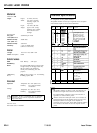
Fonts and font cartridges
There are six resident fonts in your printer. These correspond to the
resident fonts for the HP LaserJet series II printer. They are:
Line printer
8.5 point
portrait
Line printer
8.5 point
landscape
In addition, the cartridge slots on your printer let you access a wide
variety of other fonts available on font cartridges.
(
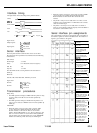
Maintenance
1
*If you regularly print high density graphics (more than 5% page density, you
need to replace the drum unit more often.
The toner cartridge and cleaning pad must be replaced about every
1,500 pages. (The initial toner cartridge lasts about 750 pages.) A
TONER EMPTY message appears when it is time to change these
components.
The drum unit must be replaced about every 10,000 pages. (If you
regularly print high density graphics (more than 5% page density).
you need to replace the drum unit at the same time you install the
eighth toner cartridge.) When you replace the drum unit, it is also
necessary to change the drum replacement cartridge, which
monitors drum usage.
A CHANGE DRUM message appears when it is time to change the
drum unit and drum replacement cartridge. Also, the indicator light
on the drum replacement cartridge helps you monitor drum usage,
so that you know when a drum change is imminent.
A service overhaul must be performed at 100,000 pages by an
authorized Epson dealer.
Each of these procedures is described in detail in this chapter.
1
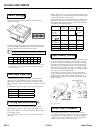
Self-Test
1
Successful completion of the self test indicates that you have set up
your printer correctly and that you are ready to connect the printer
to your computer. If you are unable to print this test, see Chapter 7
for troubleshooting information.
The self test also lets you check your print density setting. After you
print the self test, check the character pattern to see whether you are
satisfied with the print density The section in this chapter on
adjusting print density describes how to change the print density
setting.
Follow the steps below to perform the self test:
1%
1
WARNING: Never open the printer cover while the
1
J
EPL-6000 is printing.
I
1.
Be sure that your printer is plugged in and the power is on
before performing the self test.
2.
Be sure that your printer is off line. (OFF L I HE appears on
your display.) If not, press the ON LINE button to set the printer
off line.
3.
Press the MANUAL and SPECIAL buttons on your control panel at
the same time.
4. When you release the buttons, SELF TEST appears on the
display and the printer prints a self test.
Notes:
l
It is important to press the buttons at the same time.
l
For more information on using the control panel. see
Chapter 3.
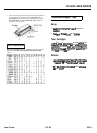
Part of the character pattern is shown below. Look at your printout
to determine whether the print is too light or too dark. If you need
to change the print density, see the following section on adjusting
print density.
Adjusting print density
If the self test you printed is too light or too dark, adjust the print
density as follows:
1.
Open the printer cover by lifting up on the latch.
Laser Printers
7/18/89
EPL-5