


EPL-6000 LASER PRINTER
2.
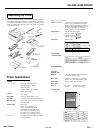
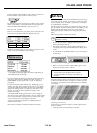
Locate the density control knob, which is in the front right
comer inside the printer.
3.
To make the print darker, turn the knob clockwise as shown
below.
Note: Increasing the print density increases toner
consumption. if you increase the mint density, you need to
replace the toner cartridge more frequently.
j
4.
To make the print lighter, turn the knob counterclockwise.
1
Font and Status Print Tests
1
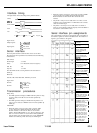
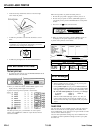
The font print test
1.
To perform the font print test, press the RESET/CONTINUE and the
SPECIAL buttons at the same time.
2. When you release the buttons, FONT PRINT appears on the
display and the printer outputs a font print test.
A portion of the font print test printout is shown below.
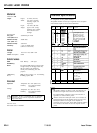
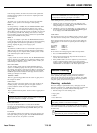
Status print test
The status print test gives you information on current printer
settings, such as paper size, number of copies selected, and font
source and number.
Follow the steps below to perform the status print test:
1.
Be sure that your printer is plugged in and the power is on.
2 Be sure that your printer is off line. (OFF LINE appears on
your display.) If not, press the ON LINE button to set the printer
off Tine.
3.
Press the A and V buttons at the same time.
4. When you release the buttons, STATUS PRINT appears on
the display and the printer outputs the status print test.
A portion of the printout is shown below.
1
Error Messages
1
Notes:
l
When a problem has been corrected, you may need to press
the ON LINE button to resume printing.
l
Certain
problem require
that you press the RESET/CONTINUE
button to continue printing. However, when the AUTO CONT
SelecType option is set to ON, the printer automatically clears
the error and resumes printing for
the following error
messages:
PS CHANGE
ERROR 21
ERROR 40
ERROR 20
ERROR 22
When the AUTO CONT SelecType option is set to ON, your
printer resumes priming even though the problem may not
have been fixed. This may cause a problem with your printed
output.
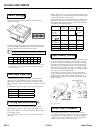
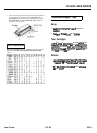
CHANGE DRUM
The drum unit may not be installed properly. Open the printer and
make sure the drum unit is seated properly in the basket. (Press
down simultaneously on the drum unit’s two green handles to make
sure the unit has clicked into place.)
Also, the drum replacement cartridge may not be installed. Be sure
to install a new drum replacement cartridge each time you replace
the drum unit.
EPL-6
7/18/89
Laser Printers