


18 Printing From a Digital Camera
Printing From a Digital
Camera
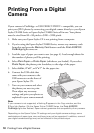
If your camera is PictBridge- or USB DIRECT-PRINT
™
-compatible, you can
print your JPEG photos by connecting your digital camera directly to your Epson
Stylus CX4200 Series or Epson Stylus CX4800 Series all-in-one. Your photos
must be sized from 80 × 80 pixels to 9200 × 9200 pixels.
1. Make sure your Epson Stylus CX is not printing from a computer.
2. If you’re using the Epson Stylus CX4800 Series, remove any memory cards
from slots and press the
Memory Card button until the Print All/DPOF/
PictBridge
light comes on.
3. Load the type of paper you want to use (see page 4). Load enough sheets for
the number of photos you’ll be printing.
4. Select
Plain Paper or Photo Paper (whichever you loaded). If you select
Photo Paper, the photos print borderless, to the edge of the paper.
5. Select
Letter, 4”x
6”, or 5”x
7” for the paper size.
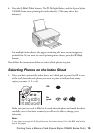
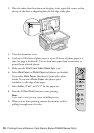
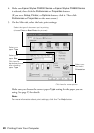
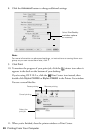
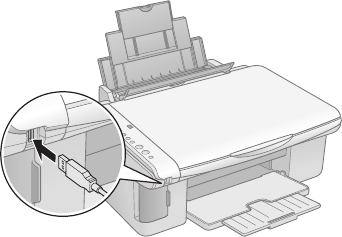
6. Connect the USB cable that
came with your camera to the
USB connector on the front of
your Epson Stylus CX.
7. Turn on your camera and select
the photos you want to print.
Then adjust any necessary
settings and print your photos as
explained in your camera manual.
Note:
If your camera is not supported, a flashing P appears in the Copy window, and the
b Error light flashes. (On the Epson Stylus CX4800 Series, the Print All/DPOF/
PictBridge light also flashes.) Epson cannot guarantee the compatibility of any camera.
Depending on the Epson Stylus CX settings and your digital camera settings, some
combinations of paper type, size, and layout may not be supported. In addition, some of
your digital camera settings may not be reflected in the printed output.