


Scanning a Photo or Document 27
Note:
If you need to scan a thick document, you can remove the document cover; see
page 7.
2. Close the cover gently so you don’t move the original.
3. Do one of the following to start EPSON Scan:
■ Windows: Double-click the EPSON Scan icon on your desktop.
■ Macintosh: Double-click EPSON Scan in the Applications folder.
■ If you are scanning from an application, start your application. Then
open the File menu, choose
Import or Acquire, and select Epson Stylus
CX4200 Series
or Epson Stylus CX4800 Series.
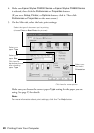
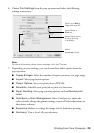
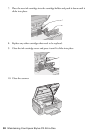
You see the EPSON Scan standby
window:
4. If the Mode setting in the upper right
corner is set to
Full Auto Mode, click the
Scan button.
Note:
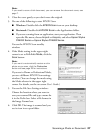
If you want to automatically restore a color
photo as you scan, click the Customize
button and see page 28 for instructions.
If you are in Home or Professional Mode,
you see a different EPSON Scan settings
window. (You can change the mode using
the Mode selector in the upper right
corner. For details, see the on-screen User’s Guide.)
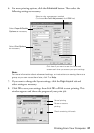
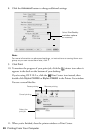
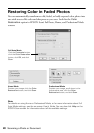
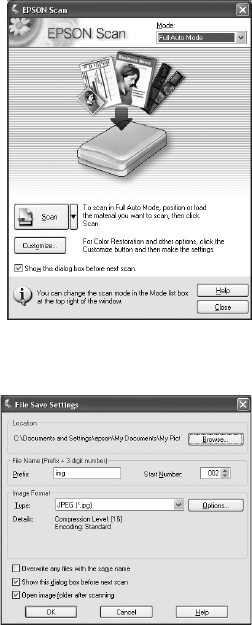
5. You see the File Save Settings window:
Choose the location where you want to
save your scanned file and type a name for
it in the Prefix box. Select a file format in
the Image Format box.
6. Click
OK. The image is scanned and you
see its icon in an open folder.