


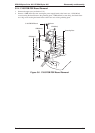

3.2.6.9 Cap Unit Removal
1. Remove the printer mechanism (see Section 3.2.5).
2. Remove the front frame (see Section 3.2.6.6).
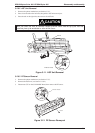
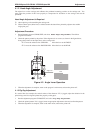
3. Remove 1 CPS (M3x6) screw securing the cap unit to the lower frame.
4. Remove 1 CPS (M3x6) screw securing the black holder to the frame
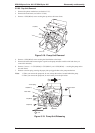
5. Remove the white tube connecting the cap unit to the pump unit.(Be careful an ink leak when you
remove this ink tube.)
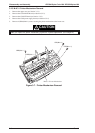
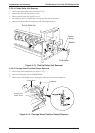
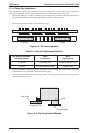
6.
Remove 3 screws — 1 CPS (M3x6), 1 CPS (M3x12), and 1 CPS (M3x8) — securing the pump unit to
the main frame.
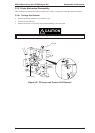
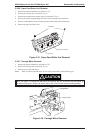
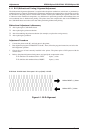
7. Release a tension spring securing the paper pick up trigger holder to the pump mechanism.
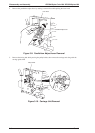
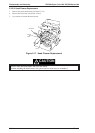
Notes:
1. When you remove the pump unit, be sure to keep the washer, located behind the pump.
2. When you remove the pump unit, do not lose the pin in the pin holder.
White Tube
CPS(M3x6)
Figure 3-18. Pump Unit Removal
1
CPS(M3x6)
CPS(M3x6)
Black Holder
CPS(M3x12)
CPS(M3x8)
Hexagonal Screw
Tension Spring
Shift
2
Push
Figure 3-19. Pump Unit Releasing
EPSON Stylus Color 200 / EPSON Stylus 200 Disassembly and Assembly
Rev. A 3-13