


56 Operating the Software
L
Proof Sign-off:
ABE J. Hashimoto, S. Yamamoto
T. Takahashi
S. Halvorson
R4CC810
User’s Guide Rev. E
SOFT.FM A5 size
8/29/03
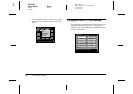
Installing the Software
1. Insert the software CD-ROM into the CD-ROM
drive.
For Windows users:
The EPSON Installer Program dialog box appears
automatically.
Note:
If the EPSON Installation Program dialog box does not
appear, click the CD-ROM icon, and then select
Open from the File menu. Then double-click SETUP.
EXE.
For Mac OS 8.6 to 9.x users:
Double-click the EPSON icon inside the EPSON
folder.
For Mac OS X users:
Double-click the Mac OS X folder inside the
EPSON folder, and then click the EPSON icon.
Note:
When the authentication dialog box for assigning
administrator privileges appears, enter the user name
and password, and then click OK.
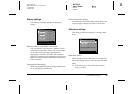
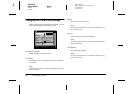
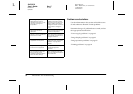
2. Select the software to install, then click Install.
Note:
❏ You can install the following software:
EPSON Photo!4
EPSON Photo Quicker
USB driver (Windows 98 only)
❏ The first time you install the software, you should
install all of them. Or to select which software to
install, click Advanced.
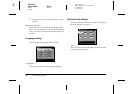
3. Follow the on-screen instructions until all of the
software is installed. When a message appears to
inform you that the installation is complete, click
OK.
Note:
The CameraStarter and AutoDownloader functions, which
are part of EPSON Photo!4, cannot be used with P-1000.
These functions are available only with EPSON digital
cameras.