Epson Stylus Photo R380
10 - Epson Stylus Photo R380 10/06
6. Press
Start.
The printer runs a head cleaning cycle and a message
appears on the LCD screen. Cleaning takes approximately
30 seconds.
Caution: Never turn off the printer while the message “Print
head cleaning in progress. Please wait.” appears on the LCD
screen. You may damage it.
Do not insert the CD/DVD tray during cleaning.
7. When cleaning finishes, press Start. The printer prints a
test pattern.
8. If there are no gaps in the pattern, press
OK to return to the
Maintenance menu.
If there are gaps in the pattern, press
Start to clean the
print head again.
If you don’t see any improvement after cleaning four or five
times, turn the printer off and wait six hours. This allows
any dried ink to soften. Then, try cleaning the print head
again.
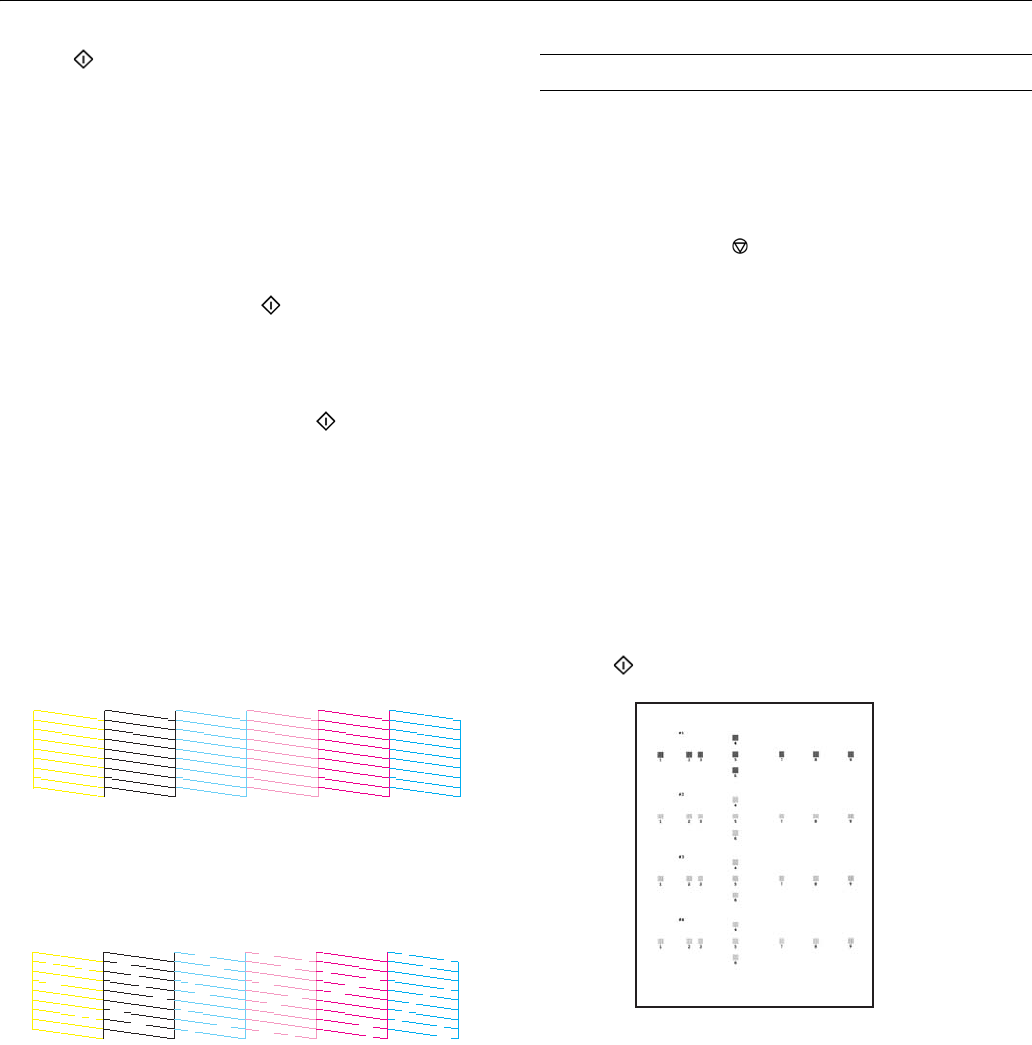
Examining the Nozzle Check Pattern
Examine the nozzle check pattern you printed. Each staggered
line should be solid, with no gaps, as shown.
❏ If your printout looks okay, you’re done.
❏ If you see any gaps (as shown below), clean the print head
again.
Aligning the Print Head
If your printouts look grainy or blurry, or you see light or dark
lines, you may need to align the print head.
Note: You may also see lines in your printouts if your cartridges are
low on ink or you need to clean the print head.
Caution: Do not press the Stop/Clear Settings button while
printing an alignment sheet.
The steps below explain how to align the print head using the
printer’s control panel. (You can also do this using your
computer. See your Printer Basics manual or on-screen
User’s Guide for instructions.)
1. Make sure the CD/DVD tray is not inserted in the printer,
and make sure the front tray is in the paper (lower) position.
2. Make sure the printer is turned on but not printing, and no
warnings or errors are displayed on the LCD screen.
3. Make sure letter-size plain paper is loaded in the printer.
4. Press
Setup to enter the Setup menu.
5. Press l or r to select
Maintenance, then press OK.
6. Press u or d to select
Head Alignment, then press OK.
7. Press
Start. An alignment sheet is printed.
8. Examine pattern #1 and find the square that is most even,
with no streaks or lines.
9. Press r then u or d to select the number for that square.
10. Press
OK.
11. Press d to select the next pattern, then repeat steps 8
through 10.
12. When you’ve finished your selections for each of the four
patterns, press
OK. You see the message “Print head
alignment is complete.”


