


Power
The 9500ci is typically wired to a
switched supply at the vehicle’s fuse box.
This allows the detector to turn on/off
with the ignition. If you prefer, the power
button can be used to manually turn the
9500ci on or off.
Power-On Indication
Once your 9500ci’s is installed, the system
will turn on with the ignition. Once the
start-up sequence is complete, the display
will show “Highway”, “Auto” or “Auto NoX”
to indicate which sensitivity mode it is in.
If you prefer, you can select alternate
power-on displays. See the Preferences
section for details.
Volume Control
Press and hold the VOL button on the
controller to adjust the alert volume level.
The audio will ramp up and down,
accompanied by a bar-graph on the display.
Once your desired level is reached, simply
release the button. This audio level will be
stored in memory, even after the detector
is turned off.
NOTE: To change the direction of
the audio ramping (e.g. down instead
of up) simply release the VOL button
quickly and press and hold again.
6 7
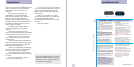
Radar Sensitivity
The “SENS” button selects the 9500ci’s
radar sensitivity. The choices are
“Highway”, “Auto” or “Auto No X”. In
general, we recommend “Auto” for every
day driving.
Highway (Highway Mode)
In this setting, the 9500ci will detect all
radar signals on all bands at maximum
range.
Auto (AutoMode)
In this setting the 9500ci will
automatically adjust its radar sensitivity
based on the speed of your vehicle. At
slower speeds, (<25mph) X and K-band
sensitivity is reduced to minimize alerts
caused by automatic door openers, etc.
At higher speeds, (>45 mph) X and K-
band sensitivity is increased to maximum.
Note: Full sensitivity is
maintained on Ka-band and Laser
regardless of your speed.
Auto NoX (AutoMode with NoX)
Auto No X works the same as AutoMode
above; however, X-band is completely
turned off.
WARNING: Do not use the 9500ci
Auto NoX unless you are absolutely
certain that there are no traffic radar
guns using X-band in your area.
Mute
The MUTE button, located in the center of
the 9500ci’s controller, has several
functions:
1. Mute the audio during a single alert.
To do this, briefly press the MUTE button
during the alert. After that radar
encounter has passed, the Mute will
disengage, and the audio will return to
your preset level.
2. Lockout false alarms using TrueLock.
To do this, simply press the Mute button
(3) three consecutive times during the
false alert. The first time the audio will
mute as stated above. The second time the
mute button is pressed; the display will
read “Lockout?” To confirm and lockout
that signal, press the mute button a third
time.
NOTE: Visually scan the area to
ensure no real threat exists before
locking out any signals.
Once a signal has been locked out, the
satellite icon on the display will rotate,
giving you a visual indication that it is
detecting that signal, but no alert will be
given.
3. Unlock a signal. To do this, simply
press and hold the Mute button while the
icon is rotating. An “Unlock” message will
be displayed. Press the mute button again
to confirm and unlock that signal.
4. Disengage “Laser Shifting”. To do this,
simply double-tap the mute button during
a laser alert once you’ve adjusted your
speed. This will put the Laser Shifters into
a “receive only” mode for approximately
(1) one minute. Once this time has passed,
the Shifters will automatically return to
the “shifting” mode.
NOTE: Shifters must be turned on
in Preferences. See Preferences
section for details.
5. Once the vehicle is under 25 mph,
press and hold to disable the Shifters for
an extended period of time. Once the
vehicle reaches 25 mph, the Shifters will
reset and return to Shift mode.
AutoMute
Your 9500ci has our patented AutoMute
feature. After the 9500ci alerts you to a
radar encounter at the volume you have
selected, the AutoMute feature will
automatically reduce the volume to a
lower level. This keeps you informed
without the annoyance of a continuous
full-volume alert.
If you prefer, you can turn AutoMute
off. See the Preferences section for details.
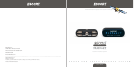
Controls and Features