


Controls and Features
Mark Locations
The Mark Location feature allows you to
mark any location for future reference.
Once marked, the 9500ci will provide an
alert, accompanied by the label you
assigned to it, on the display.
There are (4) different labels you can
use when marking a location: Speed Trap
(“SPDTRAP”), Speed Camera (“SPDCAM”),
red light camera (“REDLIGHT”) and other
(“OTHER”).
To mark a location, simply press the
“MRK” button. The display will show
“MARK?”, accompanied by a voice message.
Press the “MRK” button again, and the
labels appear, starting with “SPDTRAP”. If
this is not the label you want to use,
simply press the “MUTE” button to scroll
through the other options. Once you
reached the label you want, simply press
the “MRK” button once more to confirm.
The word “MARKED” will appear on the
display, accompanied by a voice prompt
confirming you have marked and labeled
this location.
Once marked, the PASSPORT 9500ci
will provide an alert before you reach this
area the next time.
NOTE: You must drive out of the
marked area before the mark location
alert will work.
Safety Camera
Your 9500ci comes pre-loaded with safety
camera locations in its memory.
To turn
these on or off, see the “Markers” section
in Preferences.
AutoLearn/Auto UnLearn
(X and K-bands only)
AutoLearn constantly analyzes all
incoming signals as you drive. If the same
signal is detected at the same location
approximately (3) three times, the 9500ci
will automatically lock it out as a false
alarm. Once this signal has been locked
out, no alert will be given at this location
unless it’s a new or different signal.
Once a signal has been locked out and
stored in memory, the 9500ci will also
automatically unlock a signal if it is not
present the next time you pass that
location. This reduces the chances of
locking out a real threat.
Locking Out False Alarms
To lock out a known false alarm, (X and K-
band radar, and Laser) simply press the
Mute button on the controller (3) three
times during the false alert.
NOTE: It is important to visually
look around to make certain no
traffic radar is present before locking
out a signal.
The first time you press the Mute
button, the audio will mute. The second
time the display will show “Lockout?”
accompanied by a voice prompt asking if
you want to lockout this signal. The third
time you press the Mute button, the
location and frequency of that signal is
stored in memory. The display will show
“Stored” to acknowledge the information
has been captured.
Audible Alerts
For Radar signals:
The 9500ci uses a Geiger-counter-like
sound to indicate the signal strength and
type of radar signal being encountered.
When you encounter radar, a distinct
audible alert will sound and occur faster
as the signal gets stronger. This allows you
to judge the distance from the signal
source without taking your eyes from the
road.
X-band = beep
K-band = brap
Ka-band = double-brap
POP = full double-chirp
Laser = rapid fire beeping
SWS = double buzz
At low speeds, (below 20 mph) radar alerts
will be reduced to a double-tone based on
the band received (e.g. double brap for k-
band).
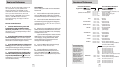
The warning distance for each label is:
Speed Trap =
.3 miles, or approximately 1,584 feet.
Speed Camera =
500’ when traveling below 55mph,
or 1000’ above 55mph
Red Light Camera =
250 feet
Other =
500’ when traveling below 55mph,
or 1000’ above 55mph
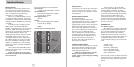
NOTE:
GPS must be on in Preferences.
98
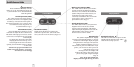
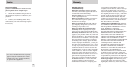
Example of a Mark Location labeled “Other.”