


2-3CrossPoint 42 HVA Matrix Switcher • Installation
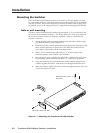
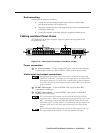
Rack mounting
Rack mount the switcher as follows:
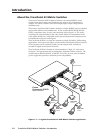
1. Attach the rack mounting brackets to the switcher with the eight
provided #8 machine screws (figure 2-1).
2. Insert the switcher into the rack, align the holes in the mounting bracket
with those of the rack.
3. Secure the switcher to the rack using the supplied machine screws.
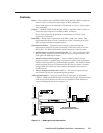
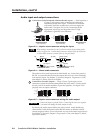
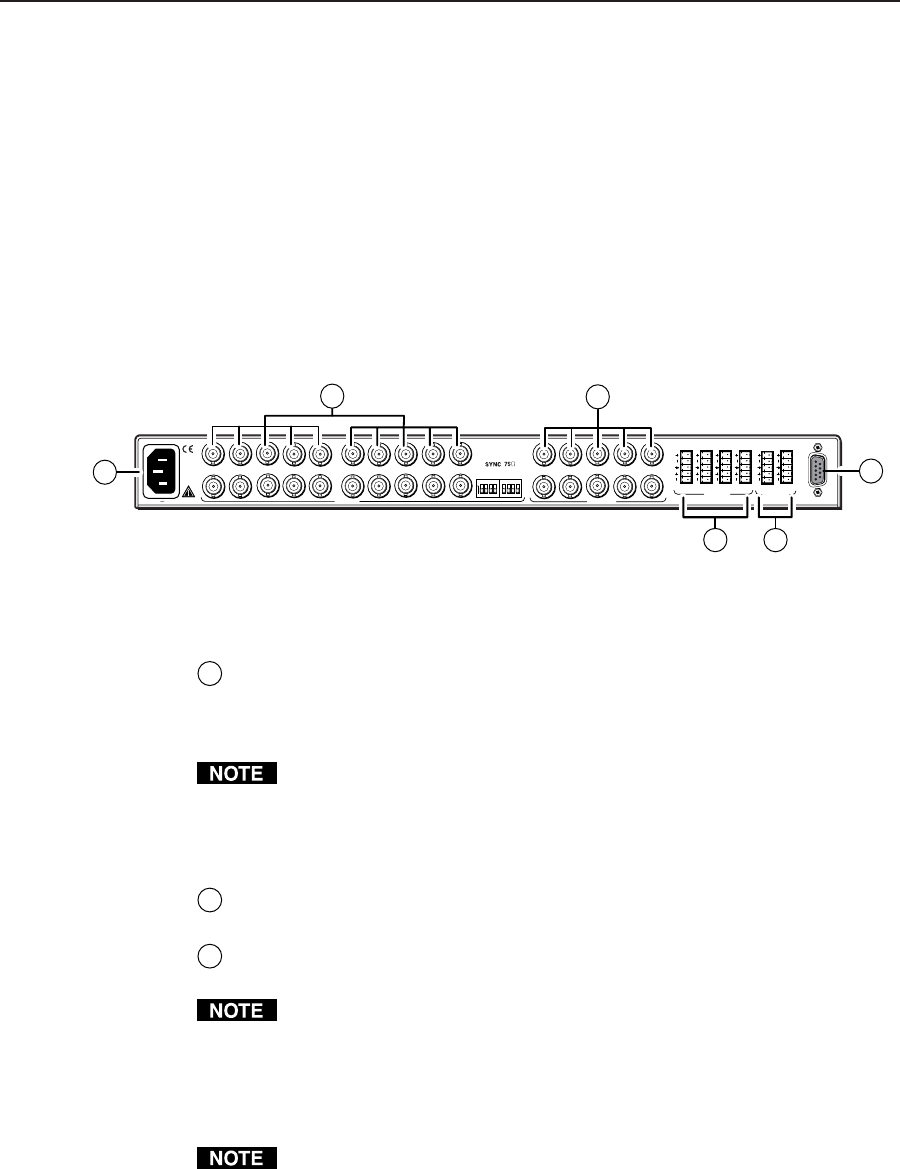
Cabling and Rear Panel Views
All connectors are on the rear panel. Figure 2-2 shows the rear panel of the
CrossPoint 42 HVA.
Figure 2-2 — Rear panel connectors, CrossPoint 42 HVA
Power connection
1
AC power connector — Plug a standard IEC power cord into this connector
to connect the switcher to a 100 to 240VAC, 50 Hz or 60 Hz power source.
Video input and output connections
All video input and output connections to the CrossPoint 42 are made with
female BNC connectors. Some types of video output devices do not have BNC
video output connectors. For these cases, a suitable cable or connector adapter
is necessary between the device output connector and the BNC input connector
of the CrossPoint.
2
RGBHV video inputs — Connect RGBHV video inputs to these BNC
connectors for each input.
3
RGBHV video outputs — Connect RGBHV video outputs to these BNC
connectors for each output.
The CrossPoint 42 HVA switcher can also switch RGBS, RGsB, RsGsBs,
component video, S-video, or composite video by using four, three, two, or one
BNC. If switching a video format other than RGBHV, ensure that the same
video planes (R, G, B, H/HV, and/or V) are used on the switcher output as on
the input. H/HV and V will switch sync signals only, but will not switch
video.
The CrossPoint 42 HVA switcher does not alter the video signal in any way.
The signal output by the switcher is in the same format as the input.
1.5A MAX
R
1
2
G
B
H
V
R
G
B
H
V
H
V
H
V
RS232
INPUTS
OUTPUTS
AUDIO
INPUTS
AUDIO
OUTPUTS
L
R
L
R
L
R
1
2
1
3
4
2
R
G
B
H
V
100-240V 50-60Hz
1
ON
2
3
4
H
V
H
V
3
4
1
2
3
2
4
5
6
1