fi-4120C2 Image Scanner Getting Started 8
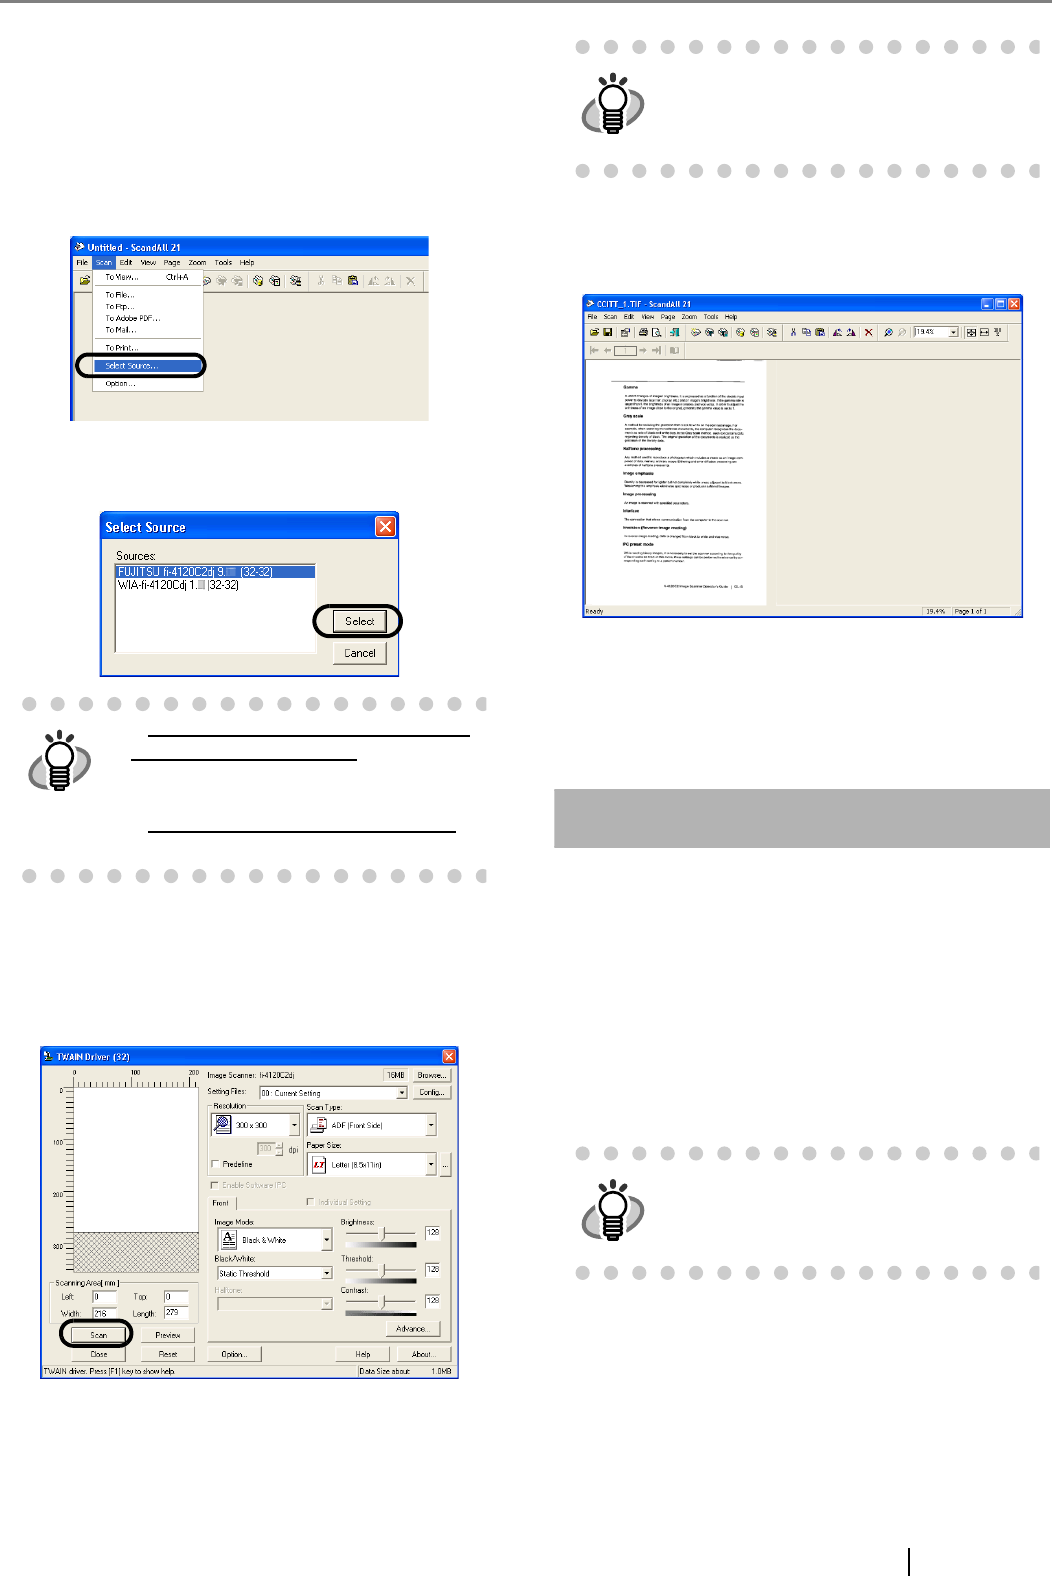
2. Start ScandAll21.
Select [Start] - [Programs] - [Scanner Utility for
Microsoft Windows] - [ScandAll 21].
3. Specify the scanner (that you will use)
Select [Select Source...]from the [Scan] menu of
ScandAll 21.
4. Select "FUJITSU fi-4120C2dj" or "FUJITSU
TWAIN32" on the dialog box
5. Select [To View...] from the [Scan] menu.
6. Set scanning resolution, document size, etc. on
the [TWAIN driver] window (for setting details of
scanning) and click the [Scan] button.
7. Documents are scanned, and the scanned
images are displayed on the [ScandAll 21] win-
dow.
If the scanning completes without any trouble, the
installation performed successfully.
For details on various types of scanning, refer to the
"fi-4120C2 Operator’s Guide" on the Setup CD-ROM.
For FUJITSU ISIS Scanner Driver
■ Preparation
Confirm the following items before installing the driver
application.
• Remove the Setup CD-ROM from its package,
but do not insert the Setup CD-ROM into the CD
driver yet.
• Confirm that the scanner is correctly connected
to your PC.
For Windows 98, Windows Me, Win-
dows 2000, Windows XP:
[FUJITSU fi-4120C2dj]
For Windows 95, Windows NT 4.0:
[FUJITSU TWAIN32]
For details on [TWAIN driver], refer to
the "FUJITSU TWAIN32 Scanner
Driver User’s Guide" provided in the
Setup CD-ROM.
For details on how to connect the scan-
ner, refer to "2.2 Connecting the Scan-
ner to Your PC" on page 3.
