3
5
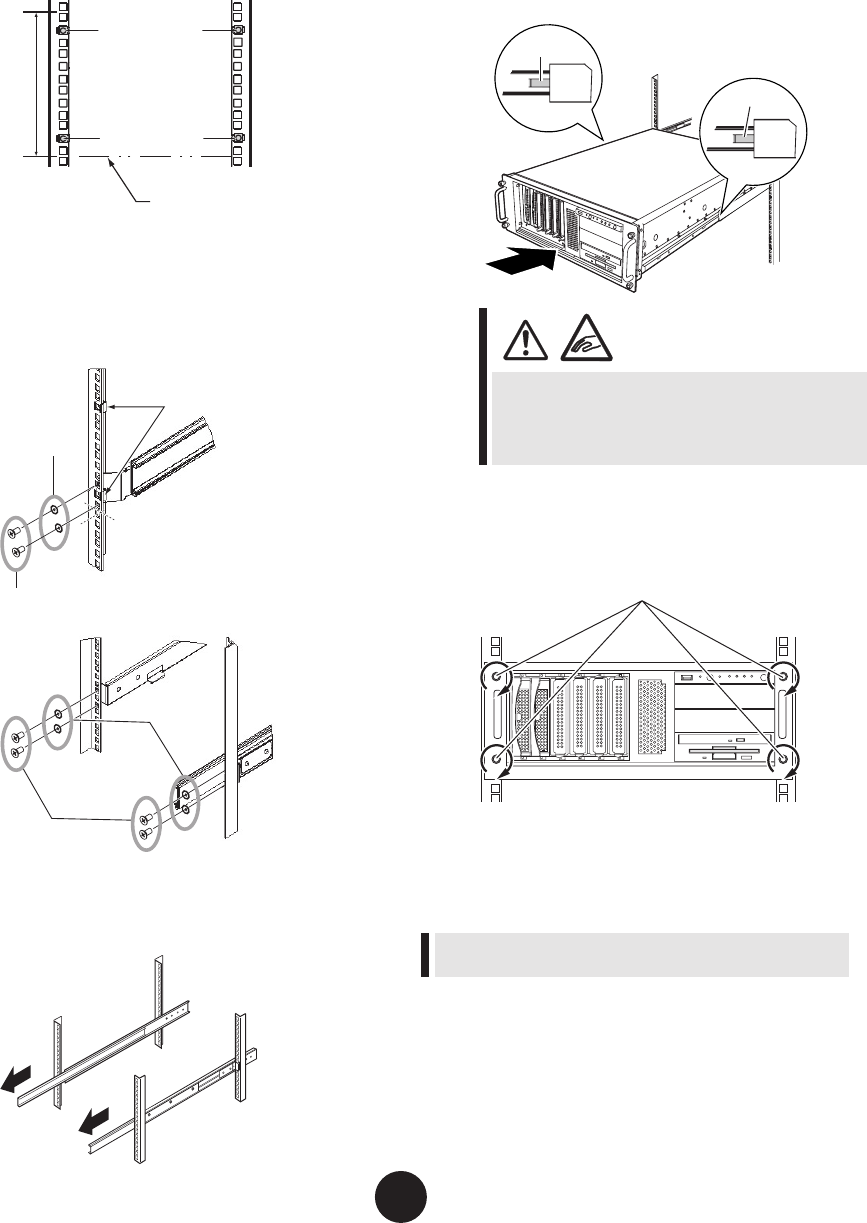
Attach M5 rack nuts.
Use 4U for each enclosure.
Insert the rack nuts in the 2nd and 11th hole posi-
tions, counting up from the base of the server, from
inside of the rack bracket.
6
Attach the rail to the rack.
Fasten the slide rail to the 1st and 3rd hole positions,
counting up from the base of the server, with M5
athead screws and washers.
7
Pull the slide rails toward the front until
they click into place.
8
Insert the server to install it to the rack.
Insert the inner rail attached to the server to the
grooves of the slide rail and slide the server to-
wards the back.
Hold the locks on the right and left of the slide rail
pressed and slide the server even further into the
rack.
Lock
Lock
Be careful when sliding the server into the rack and
returning to the original position.
There is a fear you may pinch your ngers or catch
your clothing.
9
Fasten the server to the rack.
Fasten using 4 thumbscrews (M5).
10
Install the second enclosure to the rack
in the same way.
If a server or peripheral devices are not installed in the
rack, install the attached blank panel.


