


8
1.4 Removing HDD at an Incident
VDR information is copied automatically into the backup hard disk drive (HDD) for more than 12
hours (max. 13 hours) and is then automatically written over with new data. Bring the HDD with
you after an incident if possible. Press the SAVE button only when an incident occurs. To replace
the HDD under other circumstances, see section 2.6.
To remove the HDD, do the following:
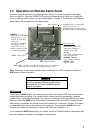
1. Press the SAVE button (long press) on the RAP (Remote Alarm Panel). The yellow LED starts
blinking, showing that recording is being terminated.
2. Wait until the LED lights steadily. If the LED does not light, press the SAVE button
consecutively until the LED lights.
Note: Turning off the power is not required at an incident. However, to replace the HDD, turn
off the power after the step 2.
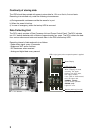
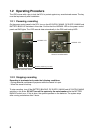
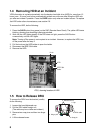
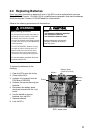
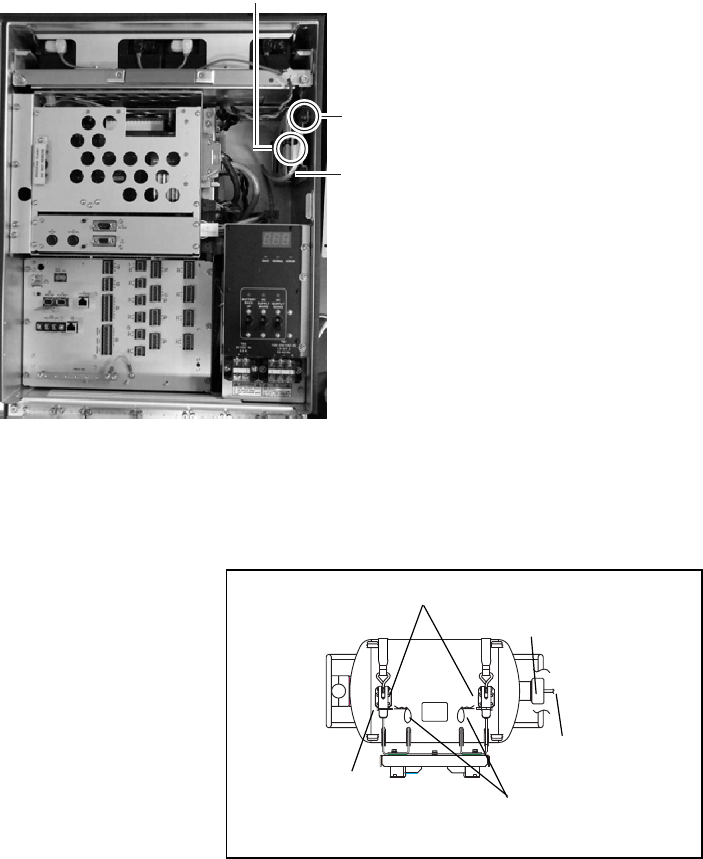
3. Pull the knob on the HDD holder to open the holder.
4. Disconnect the IEEE1394 cable.
5. Remove the HDD.
IEEE1394
Cable
Knob
HDD
HD
DCU, showing location of HDD
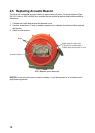
1.5 How to Release DRU
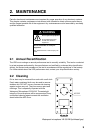
To remove the DRU from the bracket (cradle)
do the following:
1. Loosen the hand-tightened cap.
2. Pull the DRU cable straight out.
(The cable may be cut after an incident.)
3. Remove two snap pins and then two hinge
pins.
4. Lift the release levers.
2. DRU cable
1. Cap
3. Hinge pin
3. Snap pin
4. Release levers.