Magnum 1000 Workgroup Hubs Installation and User Guide (04/02)
22
www GarrettCom com
..
3.0 INSTALLATION
This section gives instructions for installing the Magnum 1000 Workgroup
Hubs, and for connecting the various Ethernet media.
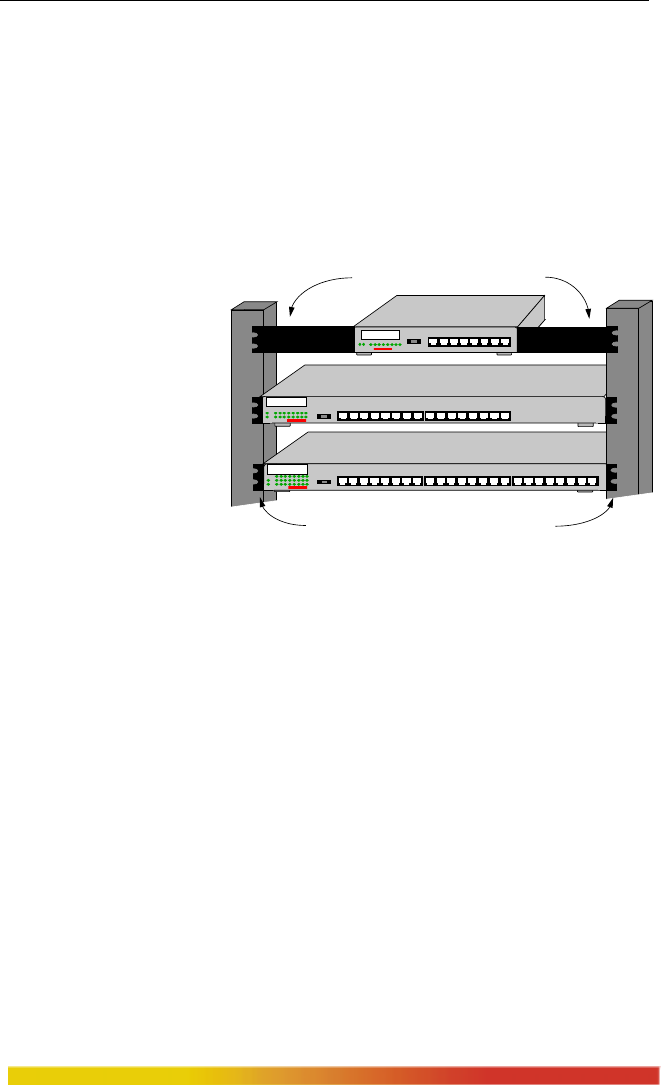
3.1 Table-Top or Rack-Mount
Installation of a Magnum 1000 Workgroup Hub is a very simple procedure.
Magnum hubs are easily mounted in a rack or on a table-top. When properly installed,
the front-mounted LED status indicators should be in plain view and easy to read.
Rack mounting
installation requires a
special rack-mount
bracket. (This is
included with models
1016 and 1024. For
model 1008, order part #
1008-RMB.) The
brackets easily attach to
the hub, which is then
installed in any standard 19 inch rack.
Figure 3.1: Magnum 1000’s,
Rack-mount Brackets
3.2 Powering the Magnum 1000 Workgroup Hub
Magnum 1000 Workgroup Hubs incorporate an internal universal power
supply, and have a recessed male IEC connector for the AC power cord at the right-rear.
A six-foot 115 VAC 60 Hz power cord is supplied with each unit shipped within the
United states and Canada.
Each Magnum 1000 Workgroup Hub’s auto-ranging power supply supports
installation environments where the AC voltage is from 90 to 260 volts with a power
input frequency between 47 and 63 Hz, and will consume a maximum of 20 watts
(estimated). In order to power down the unit, simply unplug either end of the power
cable.
When connecting various Ethernet media, there is no need to power down the
unit. Individual segments of any media type can be connected or disconnected without
concern for AC power-related problems or damage to the unit.
1 2 3 4 5 6 7 8 9 10 11 12 13 14 15 16 17 18 19 20 21 22 23 24
GARRETT
Magnum 1000
Workgroup Hub
1 2 3 4 5 6 7 8 9 10 11 12 13 14 15 16
GARRETT
Magnum 1000
Workgroup Hub
Magnum 1016 and 1024 Workgroup Hubs
Rack Mount Brackets (Included)
GARRETT
Magnum 1000
Workgroup Hub
Magnum 1008 Workgroup Hub
Rack Mount Brackets (Optional)


