


GD Systems
Page - 2 Windmill
3.2 Installing Program files
3.2.1 Installing Windmill from CD
· Before starting any installation ensure any other applications have terminated to avoid software conflicts.
· Insert the CD in the CD player.
· Using Windows Explorer or My Computer select the CD drive.
- usually D:
· Double click on the windmill directory.
· Contained in the windmill directory will be a file named SETUP.EXE
- typically assigned a 'computer' icon - but this will depend on your PC.
· Double click on this SETUP application and follow the on screen instructions.
· You will be warned to close any applications that are running.
- if you already have then click ok.
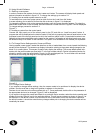
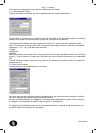
· You should then be prompted for the installation directory.
- we recommend that the system is installed in a directory:
C:\EDA
- This ensures any previous systems created using the original DOS based software are stored in the same
locations.
· Once you are satisfied with the installation directory click on the large button.
· SETUP will now install the program.
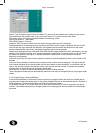
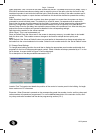
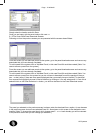
If you encounter error messages warning you of existing files this is probably due to a version of windmill
already installed on your PC. You will need to quit the set-up, un-install this older version:
start > settings > control panel > add/remove programs
Find Windmill (or PanCom) in the list provided then select it using a single click.
If you are certain you have selected the correct program, click add/remove program to remove this earlier
version.
3.2.2 Installing PanCom from CD
The installation of PanCom is very similar to the above installation of Windmill.
Instead of running the setup file contained in the windmill folder, simply follow the above instructions using
the setup file contained in the PanCom folder.
3.2.3 Installing Windmill software from 3.5" disks
For PC's not having a CD drive, installation is possible from 3.5" disks. However a PC with a CD drive is
required to first transfer the relevant files from the CD onto floppy disks. The procedure for copying the files
onto 3.5"disk is as follows:
· Format 3 x 3.5" disks.
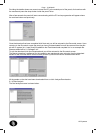
· Open Windows Explorer or My Computer
· Open (double click) the CD drive (typically D:)
· Open the Windmill folder
· Open the 3_5_disk folder
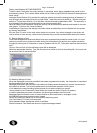
Copying files:
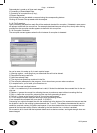
· Select (single click) the folder titled DISK1
· At the top of the window is a toolbar click on Edit
· This should drop down a list of functions
· Click on Copy
· Now select the 3.5" floppy drive
· Go back to the toolbar and again click Edit
· Now click Paste.
· This should copy the folder DISK1 onto the 3.5" disk.
· Once this is complete remove this disk and label it 'Windmill Disk 1'
· Insert the next blank disk and repeat the above copying files: section for the folder titled DISK2.
· Repeat this until all the DISKx folders have been copied.
Once the software has been copied onto 3.5" disk the procedure for installing from the disks is again similar
to installing from CD. Simply insert disk 1, open the disk and contained in the folder disk 1 will be
SETUP.EXE. Double click on SETUP to run the installation procedure.