


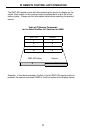

6
CONNECTING AND OPERATING
THE GEFENTOOLBOX 4X1 SWITCHER FOR HDMI
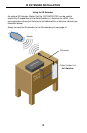
How to Connect the GefenToolBox 4x1 Switcher for HDMI
1. Use HDMI cables (provided) to connect the source device(s) to the HDMI
input port(s) of the GefenToolBox 4x1 Switcher for HDMI.
2. Use additional user-supplied HDMI cables to connect an HDMI-compliant
display to the output port on the GefenToolBox 4x1 Switcher for HDMI.
3. Connect the included 5V DC power supply to the power receptacle on the
Switcher.
4. Connect the other end of the power supply to an available power outlet.
How to Operate the GefenToolBox 4x1 Switcher for HDMI
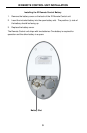
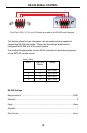
The top panel of the GefenToolBox 4x1 Switcher for HDMI contains a set of LED
indicators, displaying which input (source) is being routed to the output (display).
This allows for easy management and viewing of the input and output routing
state.
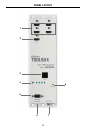
There is a single row of LED indicators on the front panel. To the left of the LED
indicator is a push button labeled “Input”. The numbers along the top of each
LED represents the currently selected Input (source): 1, 2, 3, or 4.
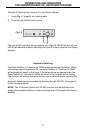
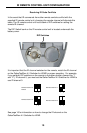
Example 1: Route Input (source) 2 to the Output
1. Ensure that an HDMI cable is connected from the source to HDMI In 2
and an HDMI cable is connected from the display to the Output port on the
Switcher.
2. Press the Input Select button until the LED under column 2 glows blue. If
the LED does not immediately appear under column 2, continue depressing
the Input Select button until the LED under column 2 is enabled (Fig 1.1).
Fig 1.1
3. Once the LED under column 2 is enabled, a picture will be displayed on the
display connected to the HDMI Output on the Switcher.