


DIVA T/A ISDN Modem User’s Guide 10
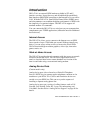
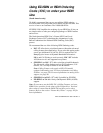
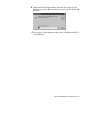
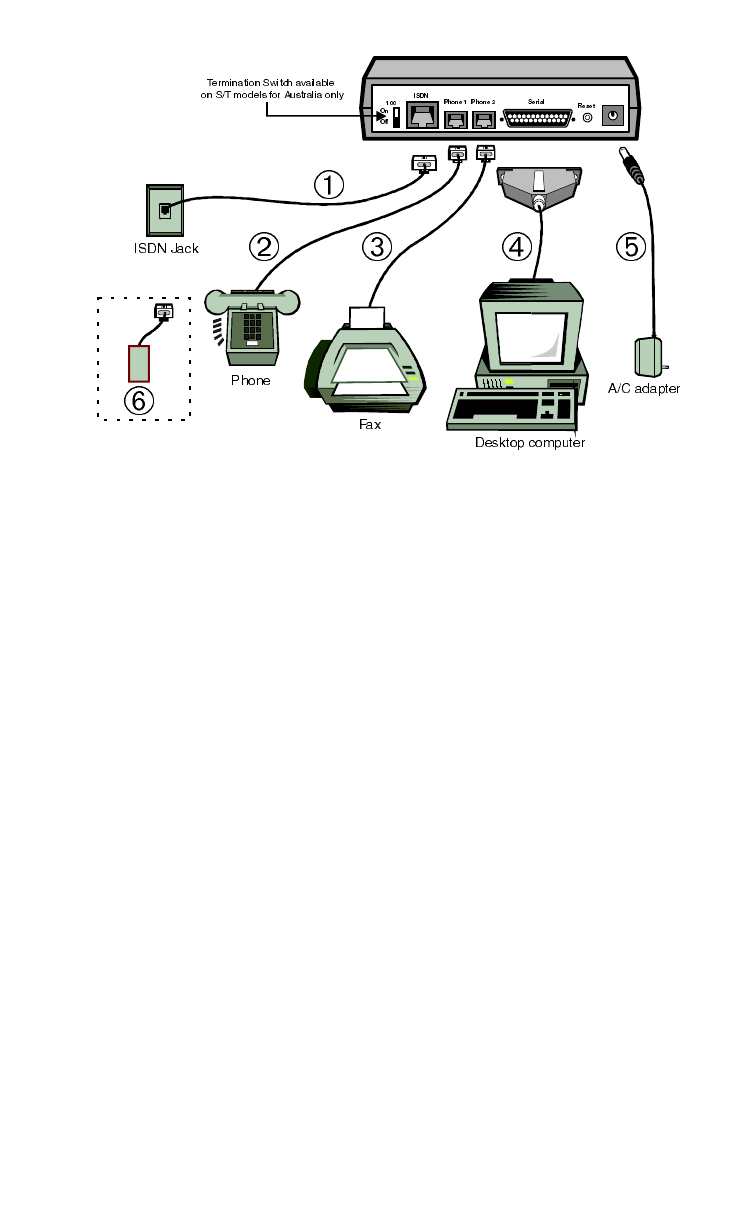
Figure 1: Connecting the Cables
➀ ISDN cable ➃ Serial cable
➁ Analog device #1 ➄ A/C adapter
➂ Analog device #2 ⑥ Phone Adapter
Note:
Phone ports and adapters are only available on certain
models.
After Connecting the Cables
After connecting the power and the ISDN cable to the DIVA T/A,
wait at least 10 seconds for the DIVA T/A to initialize and then check
the “D” and “LINK” LEDs. If they are both glowing steadily, then
your DIVA T/A is operational (either from a previous configuration
or because your line supports AutoSPID). Go to the section “What’s
Next?” on page 12 and continue.
Note:
Where AutoSPID is supported, the DIVA T/A installation
is totally Plug and Play.
If the “LINK” LED is not glowing steadily, this indicates a problem
with the ISDN line. Recheck all your cable connections.