


ENWW 2-19
To print transparencies (Mac OS X)
1 On the File menu, click Page Setup.
2 In the Paper Size pull-down menu, select size, change any other settings, and click OK.
3 On the File menu, click Print.
4 On the Paper Type/Quality panel, select the Paper tab.
5 In the Paper type pull-down menu, select the transparency type you are using.
6 Still on the Paper tab, select Best.
Note Use Best mode to print transparencies. This mode provides a longer drying time and ensures
that the ink dries completely before the next page exits the printer.
7 Change any other print settings if necessary, and then click OK.
8 Remove each sheet of media as it prints and set aside to dry. Allowing wet media to stack
up might cause smearing.
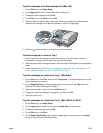
Printing on custom-size media
You can print custom-size media from Tray 1. When you want to print on custom-size media,
you need to adjust the length and width guides in the tray, and, if necessary, extend the tray
size to accommodate larger media.
z Use Tray 1 when printing on paper that is 3 to 8.5 inches wide and 5 to 14 inches long
(76.2 to 216 mm wide and 127 to 356 mm long).
z If your application supports custom-size media, set the media size in the application
before creating and printing the document. If your application does not support custom
size media, set the size in the printer driver, create the document, and then print it. (You
might need to reformat existing documents to print them correctly on custom paper sizes.)
For information about extending the tray size, see “Loading media”.
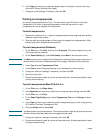
To load custom-size media
1 Raise the output tray and remove all media from Tray 1.
2 Insert the custom-size media into the tray.
3 Slide the width and length guides until they stop at the edges of the media. The guides
should be snug against the media without bending it.
CAUTION Sliding the guides too tightly against the media can cause jams.
4 Lower the output tray.
To print custom-size media (Windows)
1 On the File menu, click Print, and then click Properties. (The actual steps can vary; this
is the most common method.)
2 On the Paper/Quality tab, select the media type from the Type is box.
3 Click the Custom button under the Size is box.
4 Enter the dimensions of the paper in the Custom Paper Size dialog box, and then click
OK.
5 Change any other print settings, if necessary, and then click OK.
6 Send your job to print.