


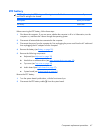


configurations, battery fast charging, and software requirements. Exhaust air is displaced through the
ventilation grill located on the left side of the computer.
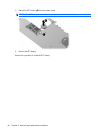
Display assembly
NOTE: All display assembly spare part kits include 2 microphones, 2 speakers, and 2 WLAN antenna
transceivers and cables.
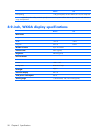
Description Spare part number
8.9-inch, WXGA display assembly for use only with computer models equipped with camera module 483384-001
8.9-inch, WXGA display assembly for use only with computer models not equipped with camera
module
482278-001
Before removing the display assembly, follow these steps:
1.
Shut down the computer. If you are unsure whether the computer is off or in Hibernation, turn the
computer on, and then shut it down through the operating system.
2.
Disconnect all external devices connected to the computer.
3.
Disconnect the power from the computer by first unplugging the power cord from the AC outlet and
then unplugging the AC adapter from the computer.
4.
Remove the battery (see
Battery on page 29).
5.
Remove the following components:
a.
Keyboard (see
Keyboard on page 30)
b.
Hard drive or solid-state drive (see
Mass storage device on page 33)
c.
Top cover (see
Top cover on page 35)
d.
Audio board (see
Audio board on page 37)
e.
System board (see
System board on page 41)
6.
Disconnect the wireless antenna cables from the WLAN module (see
WLAN module on page 45).
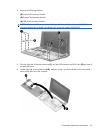
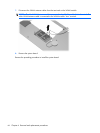
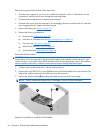
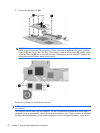
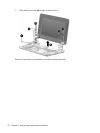
Remove the display assembly:
1. Remove the wireless antenna cables (1) from the clips and routing channels built into the base
enclosure.
CAUTION: The display assembly will be unsupported when the following screws are removed. To
prevent damage to the display assembly, support it before removing the screws.
2. Remove the four Torx8 T8M2.5×10.0 screws (2) and the two Torx8 T8M2.5×5.0 screws (3) that
secure the display assembly to the computer.
Component replacement procedures 51