


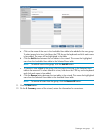


NOTE: To add all ungrouped libraries to the group, click the Add All button.
c. To remove libraries added to the group, click the names of the libraries in the Selected
Libraries table to be removed. To select several at a time, hold down the CTRL key on the
keyboard and click each library to be added.
d. Click the Remove button between the two tables in the wizard. This moves the highlighted
libraries from the Selected Libraries table to the Ungrouped Libraries table.
NOTE: To remove all libraries from the group, click the Remove All button.
7. Click the Next button.
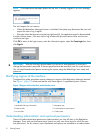
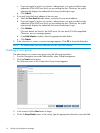
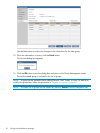
8. On the 3. Add NAS screen in the wizard, if you wish to add NAS Shares to the group:
a. Click on the name of the NAS share in the Ungrouped NAS table to be added to the
new group. To select several at a time, hold down the CTRL key on the keyboard and
click each NAS share to be added. The NAS Shares will be highlighted in the table.
b. Click the Add button between the two tables in the wizard. This moves the highlighted
shares from the Ungrouped NAS table to the Selected NAS table.
NOTE: To add all ungrouped NAS Shares to the group, click the Add All button.
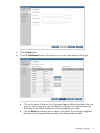
c. To remove a NAS share added to the group, click the name of the share in the Selected
NAS table to be removed. To select several at a time, hold down the CTRL key on the
keyboard and click each NAS share to be added.
d. Click the Remove button between the two tables in the wizard. This moves the highlighted
shares from the Selected NAS table to the Ungrouped NAS table.
NOTE: To remove all NAS shares from the group, click the Remove All button.
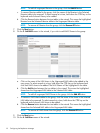
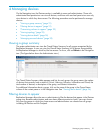
9. Click the Next button.
10. On the 4. Add User screen of the wizard:
18 Configuring the Replication Manager