


Troubleshooting
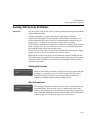
Solving Ink System Problems
11-34
If the Replace Ink System Key does not Work
1 Make sure the window is closed before you press the Replace Ink System key.
2 Try pressing Enter to clear the previous message.
3 The printer may be busy; wait until it has completed the current process. Press the
Cancel key if you want to interrupt the current process.
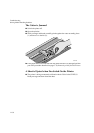
If Brand New Printheads have Problems
1 Your printer may not detect the ink system that you have installed. Make sure that
the protective blue tape and green cardboard have been removed from the
printheads.
2 Make sure that the electrical contacts on the printheads and the printer carriage are
free from ink deposits. (See 11-42, Cleaning Electrical Contacts).
3 Try reseating the printheads. If you have trouble reseating the printheads, see If You
Have Problems Reseating a Printhead on page 11-41.
NOTE: After you remove or reseat a printhead, the printer will run its automatic
printhead alignment procedure.
4 Check the ink cartridge to see if it has ink.
If the printheads are functioning, but you are not getting the image quality you
expect, see 11-5, Solving Image-Quality Problems.
If there is a Failure after Refilling Printheads
If you see the message “Ink cartridge valve out” or “Ink cartridges removed” after
printheads have been refilled, it is because an ink cartridge valve has become
disconnected or the printer cannot detect an ink cartridge. Printing is disabled.
To fix this problem:
1 Press the
↓ key.
2 When prompted, open the left door to access the ink cartridges.
You will see the message “Check ink cartridges / Abort” where the flashing squares
indicate which valves to check. See 11-40, Checking the Ink Cartridges.
If you don’t correct the error now, you will see the status message “Ink system
error”.