


56 Chapter 4
Viewing Catalogs and Saving Files
File Menu Functions
Formatting a Floppy Disk
You can format a floppy disk in the analyzer. The format is MS-DOS
1
. Note that it is not
necessary to format your floppy disk with the analyzer; preformatted disks can be used
with the analyzer.
1. Place the 1.44-MB disk you wish to format into the floppy drive (A:\) of the analyzer.
Only 1.44-MB floppy disks are supported by the analyzer. Therefore, 720-kB floppy
disks will not work reliably.
2. Access the
Format key by pressing File, More, and then Format. The directory information
box is active (highlighted), however, only the floppy disk volume [-A-] is shown on the
display.
The directory information box displays all files present on the floppy disk inserted in
drive “A:”. If you have not inserted a disk into drive “A:”, or the disk you are attempting
to format has no pre-existing formatting, the error message: bad, missing, or
unformatted disk is displayed in the status line.
3. Press
Format Now. The following message appears in the display window: WARNING: You
are about to destroy ALL data on Volume A:. Press Format Now again to
proceed or any other key to abort. To abort disk format, press any key but
Format
Now
. When a disk is formatted, all data on the disk is destroyed.
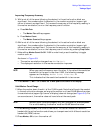
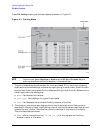
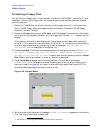
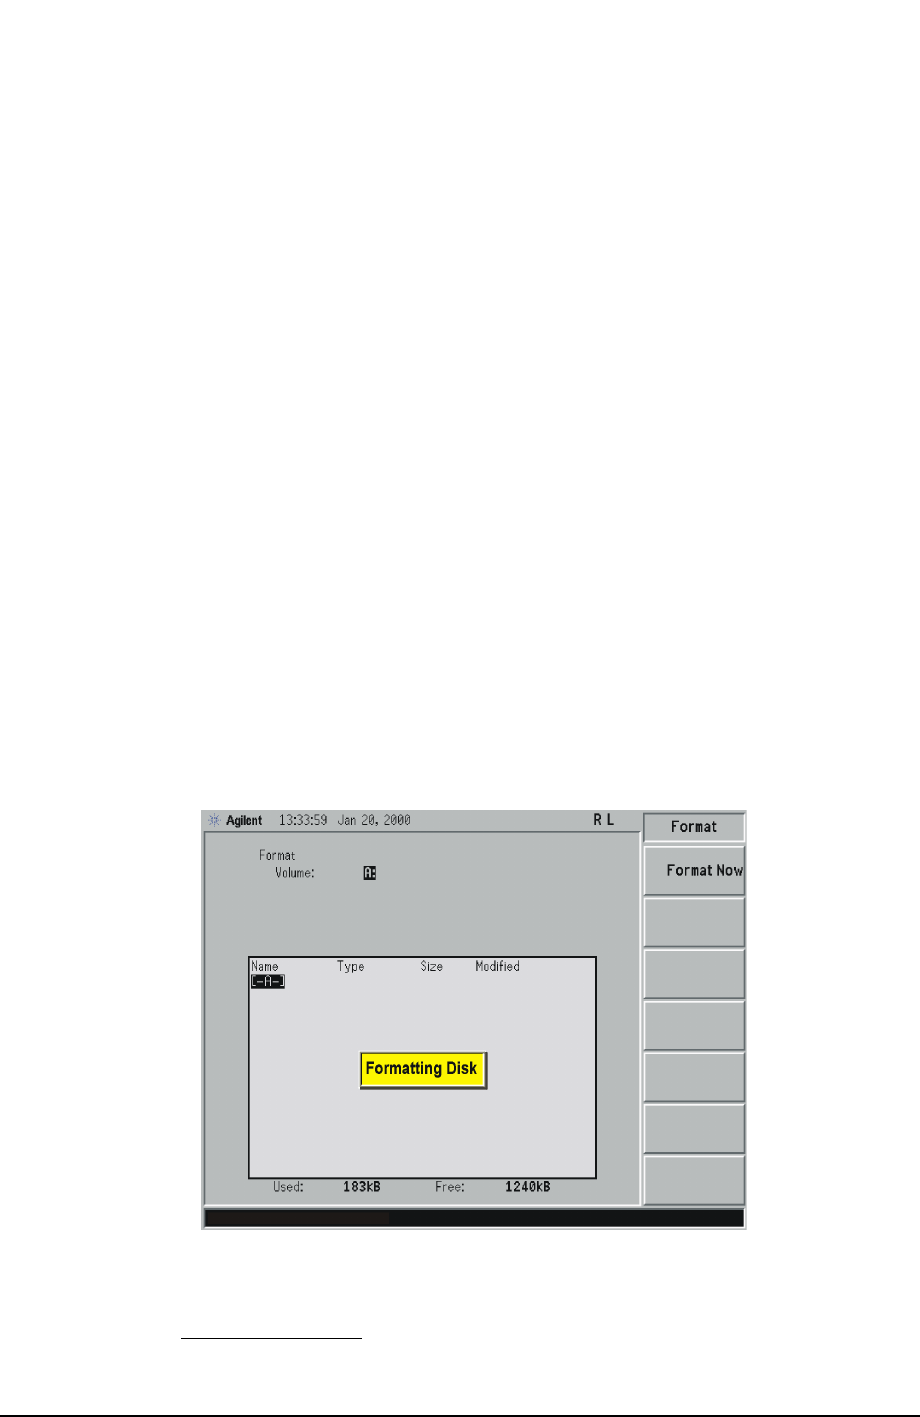
4. Press
Format Now a second time to format the disk. You will see the message:
Formatting Disk in the display window. Pressing any other key after receiving the
warning in step 3 on page 56, will abort the formatting process. See Figure 4-2. The
format process takes approximately three minutes.
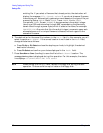
Figure 4-2. Format Menu
5. When formatting is complete, a message, Volume A: formatted appears on the status
line. The disk is now ready to save files.
1. MS-DOS is a U.S. registered trademark of Microsoft Corporation.