


8
MSSC, LLC Collinsville, IL USA Tel: 618-343-1006 Fax: 618-343-1016 55899 Rev 18210
www.msscllc.com
Quick Startup
QM2 Start Up Procedure
When starting up the QM2, the internal fan will start running and then the software initializes
and the unit will boot up. The startup cycle will take 10-15 seconds.
Please note, the photocell CANNOT be blocked/activated during this startup cycle. If the
photocell is blocked, the unit will experience an ERR, display ERR on the screen and the
QM2 will not function. The operator must clear the path to make the photocell not activate,
press RUN key on the QM2 and press the RUN key a second time cycling from STOP to
RUN on the display.
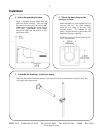
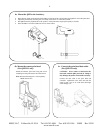
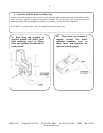
1. Install your QM2 and QM2 ink cartridge according to the installation instructions
a. CAUTION: Power must be off when installing or replacing a QM2 Ink Cartridge.
b. CAUTION: The QM2 will only function with QM2 Ink Cartridges.
c. CAUTION: Never connect or disconnect the data cable with the QM2 powered on.
Doing so may damage the printer and void the warranty.
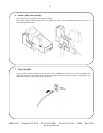
2. Plug QM2 into proper power receptacle and turn the QM2 on using the on/off switch.
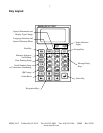
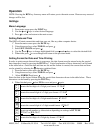
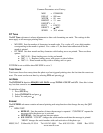
3. The QM2 can display screen prompts in English, French, Spanish, German, Finnish and Arabic
languages. The unit is shipped with English as the default language. To switch the language
press the FONT key on the keypad, then using the arrow keys on the keypad select the desired
language and then press the enter key. You can only change the language at the main menu
screen. The QM2 will always restart in the last language selected.
4. Set the date and time using the DATE key on the keypad. Likewise, you will need to set the date
and time format in order to print date and time. The format is set using the DATE key.
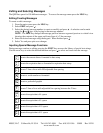
5. Enter your message(s) using the MSG key on the keypad and then using the arrow keys highlight
EDIT and press enter key. You can load 100 messages, 00 – 99, and the maximum is 30 full
height characters per message. To create a message or edit a message use the mobile phone like
keypad layout.
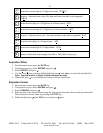
6. To print the desired message, press MSG, then SELECT and press the enter key. Using the
arrow keys, highlight the desired message and press the enter key. Press the enter key again
indicating yes I want to print the message.
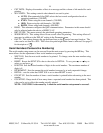
7. Last step before printing, you must setup the QM2. This is done using the STUP key on the
keypad. There are many functions performed at this point.