


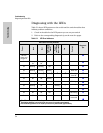
4-12
Replacing Components
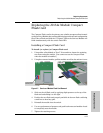
Replacing the J9154x Module Disk Drive
Replacing Components
Replacing the J9154x Module Disk Drive
The hard disk drive (HDD) is the primary storage medium located on the
Services Module. When a disk drive fails the “HDD status” LED on the Services
Module will blink simultaneously with the switch Fault LED.
Installing a Disk Drive
To install (or replace) a Disk Drive:
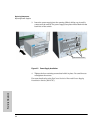
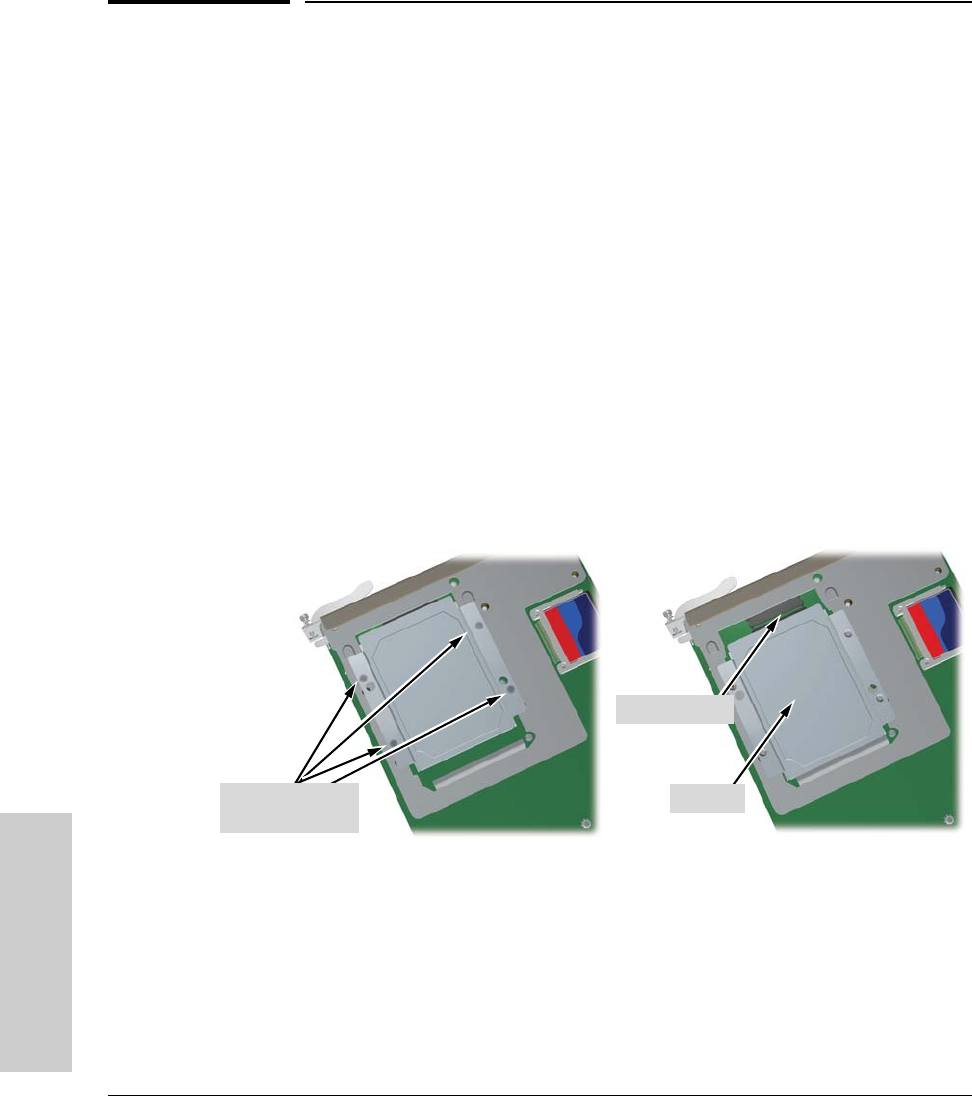
1. Using either a flat-bladed or Torx T-10 screwdriver loosen the retaining
screws securing the module. (You cannot access the disk drive when the
module is installed.)
2. Using the extractor handles, pull the module from the slot and turn it over.
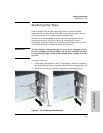
3. Using a Cross Recess Type 1 No.1 (Phillips tip) screwdriver remove the 4
retaining screws holding the disk drive.
4. Slide the disk drive half way back to disconnect it.
5. Position the disk drive in the middle of the disk drive slot.
6. Using either side of the disk drive bracket, lift the disk drive out.
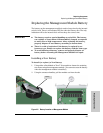
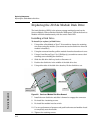
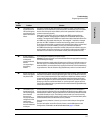
Figure 4-8. Services zl Module Disk Drive Removal
7. Install the new disk drive and slide it forward to engage the connector.
8. Re-install the 4 retaining screws.
9. Re-install the module into the switch.
10. Use an equal amount of pressure and push both extractor handles closed
to completely seat the module.
11. Tighten the retaining screws.
Disk drive
retaining screws
Disconnected
Lift out