


product purchased. This code is matched against the serial number of the unit for verification. Use the
TOOLS/PRODUCT REGISTRATION menu option to enter the correct code. This only needs to be done once
and is stored in a file for recall on future uses.
DISPLAY FIELDS
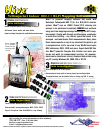
Certain fields are displayed as data records come into the Dolphin system. These fields are (from left to
right):
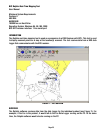
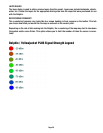
Longitude (in decimal degrees)
Latitude (in decimal degrees)
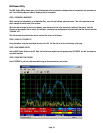
Data Value (usually RSSI in dBm)
Product Serial Number
Point Count (current count of points plotted on the map)
These always reflect the last data record to come into the Dolphin system.
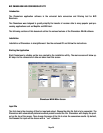
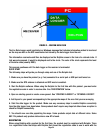
CREATING/OPENING A GEOSET
When starting up the Dolphin system, a Geoset must be open in order for the data points coming in to be
properly attached to map layers. You can open an existing geoset or create a new geoset.
An existing geoset will have the map layers already set up. When creating a new geoset, the layer dialog
will appear. Choose layers from the maps that were purchased for use with the Dolphin. There will already
be a ‘DOLPHIN’ layer. DO NOT REMOVE this layer. This is needed to store the data points.
After choosing the map layers, the geoset is now ready to accept points.
NOTE: The maps may not be visible until the first data point comes in to center the coordinates.
SAVING A GEOSET
Pressing the toolbar button that looks like a spinning CD allows you to save the geoset loaded. Save it to
any filename for use in later Dolphin sessions.
NOTE: Data points will not be saved. Only the map layers.
CLEARING DATA POINTS
If you wish to clear the existing data from the geoset at any time, use the toolbar button that appears to be
an eraser wiping off data. The next point taken in will be considered the first point again.
PRINTING A MAP
You may print out a copy of the map by pressing the printer icon on the toolbar.
ZOOM MODE
You may zoom in or out on the map by selecting the magnifying glass icon with a ‘+’ sign for zooming in
or a ‘-‘ sign for zooming out. This will turn the cursor into the appropriate magnifying glass. Simply click
on the area to zoom in/out on and the map will adjust accordingly.
SAVE AS BITMAP
The map may be exported to a bitmap format by selecting the icon on the toolbar with a globe on the top
and the word ‘BITMAP’ on the bottom.
Page 25