


16
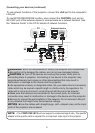
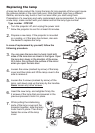
Replacing the lamp
$ODPSKDV¿QLWHSURGXFWOLIH8VLQJWKHODPSIRUORQJSHULRGVRIWLPHFRXOGFDXVH
the pictures darker or the color tone poor. Note that each lamp has a different
lifetime, and some may burst or burn out soon after you start using them.
Preparation of a new lamp and early replacement are recommended. To prepare
a new lamp, make contact with your dealer and tell the lamp type number.
Type number : DT01091
1.
Turn the projector off, and unplug the power cord.
Allow the projector to cool for at least 45 minutes.
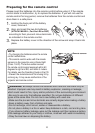
2.
Prepare a new lamp. If the projector is mounted
on a ceiling, or if the lamp has broken, also ask
the dealer to replace the lamp.
In case of replacement by yourself, follow the
following procedure.
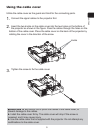
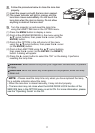
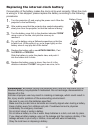
3.
You can open the lens door by hand. Hold both
VLGHVRIWKHOHQVGRRUDVVKRZQLQWKH¿JXUH2SHQ
the lens door slowly in the direction of the arrow
till it clicks. Do not touch the surface of the mirror
when you open the lens door.
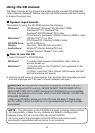
4.
Loosen the screw (marked by arrow) of the lamp
cover and then slide and lift the lamp cover to the
side to remove it.
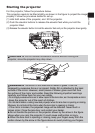
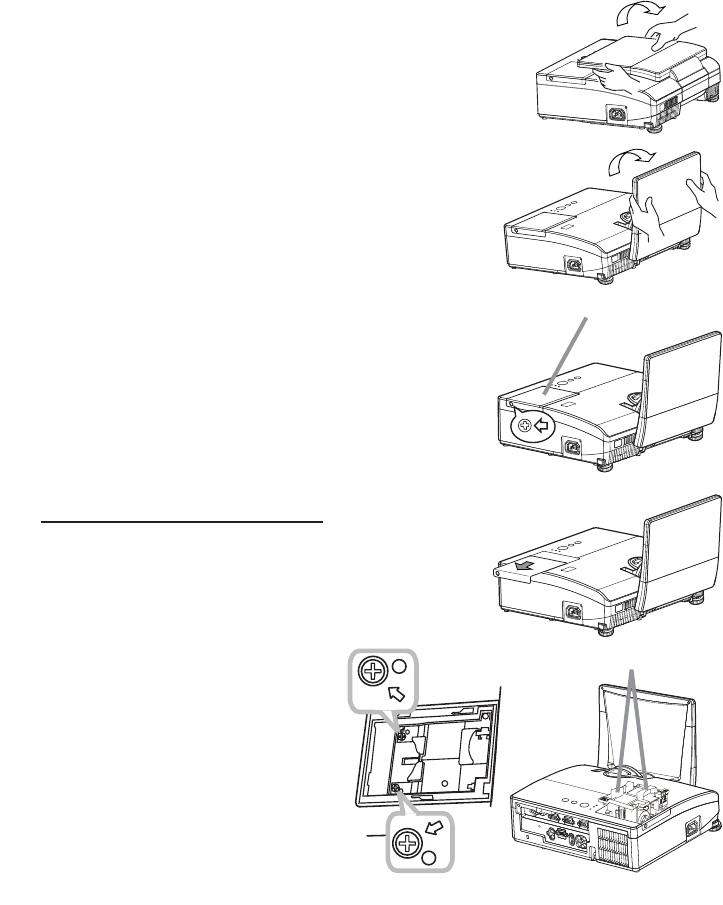
5.
Loosen the 2 screws (marked by arrow) of the
lamp, and slowly pick up the lamp by the handles.
Never loosen any other screws.
6.
,QVHUWWKHQHZODPSDQGUHWLJKWHQ¿UPO\WKH
2 screws of the lamp that are loosened in the
previous process to lock it in place.
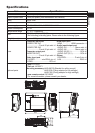
7.
While putting the interlocking
parts of the lamp cover and the
projector together, slide the lamp
FRYHUEDFNLQSODFH7KHQ¿UPO\
fasten the screw of the lamp
cover.
lamp cover
Handles