PRELIMINARY RELEASE
Hitachi Lightning 9900™ V Series LUN Expansion and Virtual LVI/LUN User’s Guide 35
4.2.2 Creating VLL volumes
The Install VLL volume function allows you to define and install one or more Virtual LVI/LUN
volumes under an existing volume.
Note: The Install VLL volume Function allocates VLL volumes in the order in which the
function finds sufficient free space for the VLL volumes, so for optimum space allocation you
should allocate VLL volumes in descending order of capacity.
1. Change to Modify mode (refer to section 2.3 if you need instructions). Select the LUN
Expansion (LUSE)/Virtual LVI/LUN (VLL) button (
) to open the LUSE/VLL panel.
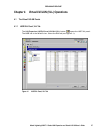
The LUSE tab is the default view (refer to Figure 3.1). Select the VLL tab (refer to
Figure 4.1)
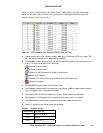
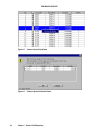
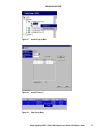
2. On the Parity Group – LDEV Outline (on the upper left corner of the panel; refer to
Figure 4.2) Select the LDEV folder to open a list of Control Units. Select a Control Unit,
and the LDEV information table (on the upper right of the panel; refer to Figure 4.3)
displays detailed information about the LDEVs of the selected Control Unit.
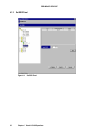
3. Double-click any part of the Parity Group - LDEV outline view to display the Install CV
pop-up menu (see Figure 4.7).
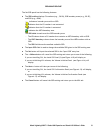
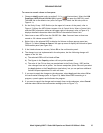
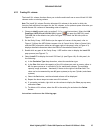
4. Select Install CV to display the Install CV Panel (1) (see Figure 4.8). On this panel, do
the following:
a) In the Emulation Type drop-down box, select the emulation type.
b) In the Size field enter the capacity of the VLL volume you want to create, either in
MB for open systems or in cylinders (Cyl) for mainframe volumes. The available
capacity range (minimum - maximum) is shown to the right of the Size field. The
value can be incremented by one MB (open systems) or by one Cylinder (mainframe
systems)
c) Select the Set button, and the selected volume will be displayed
d) Repeat the above steps to create more VLL volumes.
e) If you make a mistake, right-click on the volume to display the Clear pop-up menu,
and select Clear.
f) To delete a VLL volume, select the DV in the setting list and select the Delete
button.
Instructions continue on the following page.


