


7
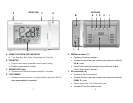
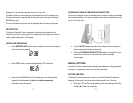
G. MODE button
• Press to select: ALARM 1, ALARM 2 or Temperature
• Press & hold for 2-3 seconds to set the date and time manually.
H. SET
button
• Allows programming ALARM 1 and its snooze interval
• Activates or deactivates ALARM 1
I. SET
button
• Allows programming ALARM 2 and its snooze interval
• Activates or deactivates ALARM 2
J. BATTERY COMPARTMENT
Accommodates 2 (two) UM-3 or AA 1.5V alkaline batteries
K. FLIP BUTTON
• Press to flip the projected image 180°.
• Press and hold for 2-3 seconds to alternate projection display between
time & temperature
L. FOCUS knob
Allows adjusting the projected image sharpness
M. ROTATE knob
Allows rotating of the projected image clockwise or counterclockwise
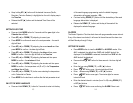
SIDE VIEW
N
O
8
N. “CONTINUE PROJECTION” switch
Activates the continuous projection function
O. AC/DC ADAPTER INPUT
Provides power via AC/DC adapter
GETTING STARTED
• We recommend using alkaline batteries.
• Avoid using rechargeable batteries as they may not provide
appropriate power levels.
• Insert batteries and power adapter before use.
IMPORTANT NOTES
:
1). The Atomic Projection Clock does not work without the batteries
installed, even if AC adapter is connected.
2). Continuous projection is designed to work only at lower light
conditions (at 100LUX and lower)
During the day to check if continuous projection works, slide the
“CONTINUE PROJECTION” switch to the UP position, cover the light
sensor with the palm of your hand when AC adapter connected and
batteries are installed.
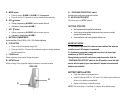
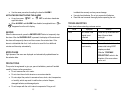
BATTERY INSTALLATION
• Open the battery compartment door.
• Install 2 batteries (UM-3 or “AA” size 1.5V) matching the polarity as
shown in the battery compartment.
• Replace the battery compartment door.
NOTE: Unit will display a “Low Battery” indicator when batteries age.