


Some non-IBM computers support the cable-select setting, where the position of
the device on the cable determines whether a device is master or slave. See the
documentation that comes with your computer to determine if your system
supports this setting.
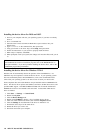
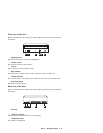
Step 4. Setting the configuration jumper
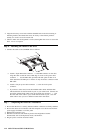
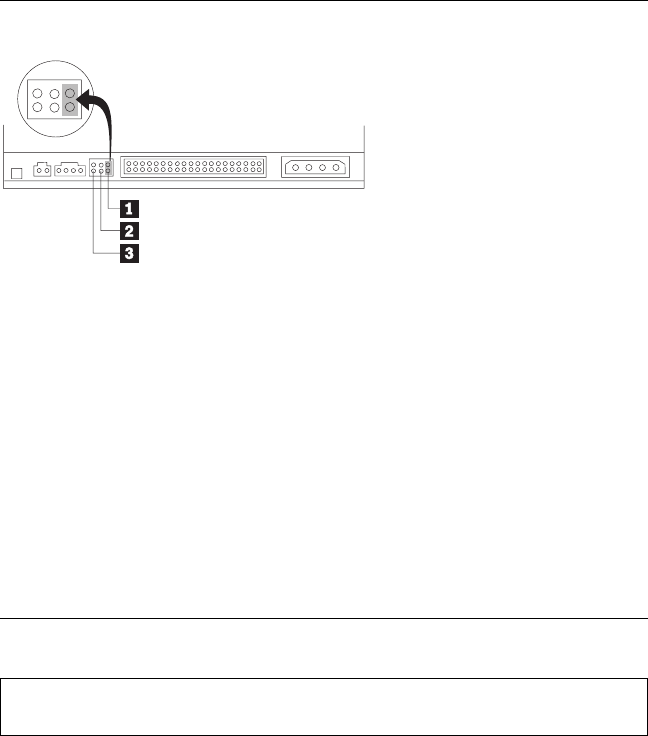
The illustration above shows the master 1 setting, the slave 2 setting, and the
cable-select 3 setting. Configure the CD-ROM drive by placing a jumper over the
set of pins corresponding to the setting you chose in “Step 3. Selecting an IDE port”.
If you are configuring the CD-ROM drive as master, set the jumper to the master
1 device setting. (This is how the drive is set when it is shipped.) If there is a
second device on the IDE port, make sure that device is configured as slave.
If you are configuring the CD-ROM drive as slave, set the jumper to the slave
2 device setting. Make sure that the other device on the IDE port is configured
as master (or master-with-slave-present).
If you are configuring the CD-ROM drive as cable-select, set the jumper to the
cable-select 3 device setting. If there is another device on the IDE port, make
sure that the second device is also configured for cable-select.
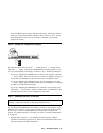
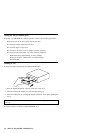
Step 5. Mounting the drive in the bay
Attention: Be sure to use the M3 x 5 mm mounting screws in the option
package. Using screws that are too long might damage the drive.
You can mount the CD-ROM drive horizontally or vertically in the computer. If you
mount the drive vertically, you must secure any CDs you place into the drive before
the drive tray is closed, or the CD-ROM drive will not be able to read the CD
properly. For further instructions on securing your CDs in a vertically mounted drive,
go to page 2-2.
1. Slide the drive into the bay. Your computer might have specific required
procedures for installing storage devices. Refer to the documentation that comes
with your computer for further instructions.
Part 1: Installation guide 1-13