


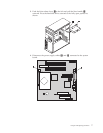
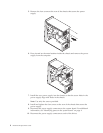
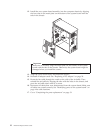

5. Remove the four screws at the rear of the chassis that secure the power
supply.
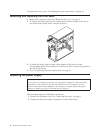
6. Press inward on the metal retainer inside the chassis and remove the power
supply from the computer.
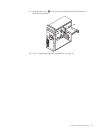
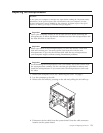
7. Install the new power supply into the chassis so that the screw holes in the
power supply align with those in the chassis.
Note: Use only the screws provided.
8. Install and tighten the four screws at the rear of the chassis that secure the
power supply.
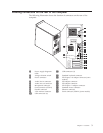
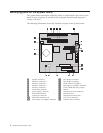
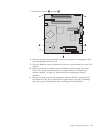
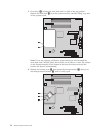
9. Reconnect the power supply connectors to the system board. For additional
information, see “Identifying parts on the system board” on page 4.
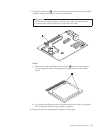
10. Reconnect the power supply connectors to each of the drives.
8 Hardware Replacement Guide