


Chapter 6. Diagnosing Printer Problems 6–15
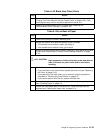
Table 4: All Black (Any Color) Prints
Step Action
1. Run several full-color gradient test prints from the density control panel (see
“Printing Test Prints from the Density Control Panel” on page 6–24). If the
problem goes away, call for service to replace the control unit.
2. Replace the photoconductor drum cartridge (see “Replacing the
Photoconductor Drum Cartridge” on page 5–33).
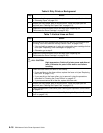
Table 5: Dirt on Back of Paper
Step Action
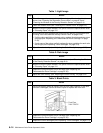
1. Power on the printer to initiate a warmup cycle.
2. Inspect the transfer drum after the warmup cycle is finished.
• If the transfer drum surface is clean, go to step 4
• If the transfer drum surface is dirty, go to step 3
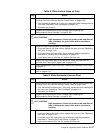
3. Make sure that the transfer drum cleaning assembly is fully seated and locked
in place (see “Replacing the Transfer Drum Cleaning Assembly” on page
8–12).
<2-6> CAUTION:
High temperature. Switch off printer power and allow at
least 15 minutes for parts in this area to cool before
handling.
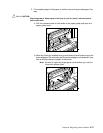
4. Check the fuser rollers for flaws or dirt buildup.
• If you see flaws on the fuser rollers, replace the fuser unit (see “Replacing
the Fuser” on page 5–19).
• If you see dirt on the fuser rollers, try to remove it using the procedure
described in “Cleaning the Fuser Rollers” on page 8–5.
• If you cannot remove all of the dirt, replace the fuser unit.
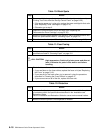
5. Make sure you are not using predrilled paper, which may damage the printer.
See “Choosing Paper” on page 2–2.
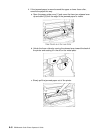
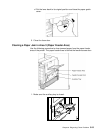
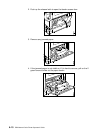
6. Inspect the entire paper path for dirt and toner. Clean the paper path as
required (see “Cleaning the Paper Path” on page 8–3).