


12 Intel® Server Board SE7230NH1-E and Intel® Server Platform SR1475NH1-E User’s Guide
Upgrading the BIOS
Follow the instructions in the readme file that came with the BIOS upgrade. When the
update completes, remove the bootable media from which you performed the upgrade.
Note: Do not power down the system during the BIOS update process! The system will reset
automatically when the BIOS update process is completed.
Note: You may encounter a CMOS Checksum error or other problem after reboot. If this
happens, shut down the system and boot it again. CMOS checksum errors require that you
enter Setup, check your settings, save your settings, and exit Setup.
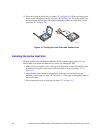
Clearing the CMOS
If you are not able to access the BIOS setup screens, the CMOS Clear jumper will need to
be used to reset the configuration RAM.
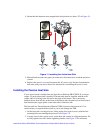
1. Power down the system and disconnect the AC power.
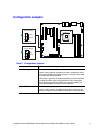
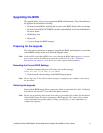
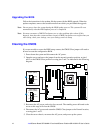
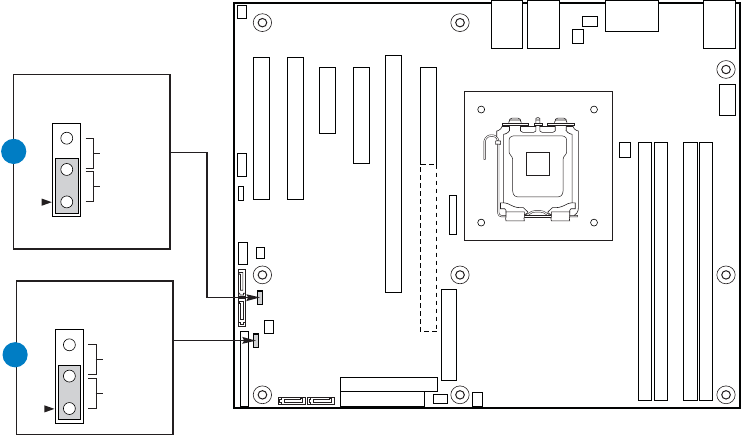
2. Open the server and move the jumper from the normal operation position, at pins 1
and 2, to the CMOS Clear position covering pins 2 and 3 as indicated in the following
diagram.
3. Reconnect the AC power, and wait a few seconds. The standby power delivered to the
server at this stage will clear the CMOS.
4. Disconnect the AC power and return the CMOS Clear jumper to the Normal location,
covering pins 1 and 2.
5. Close the server chassis, reconnect the AC power, and power up the system.
TP01794
3
2
Clear CMOS
Jumper (J9G3)
Clear
Normal
3
2
CMOS Configuration
Jumper (J9H3)
Config
Normal
B
A
Off - Recovery