21
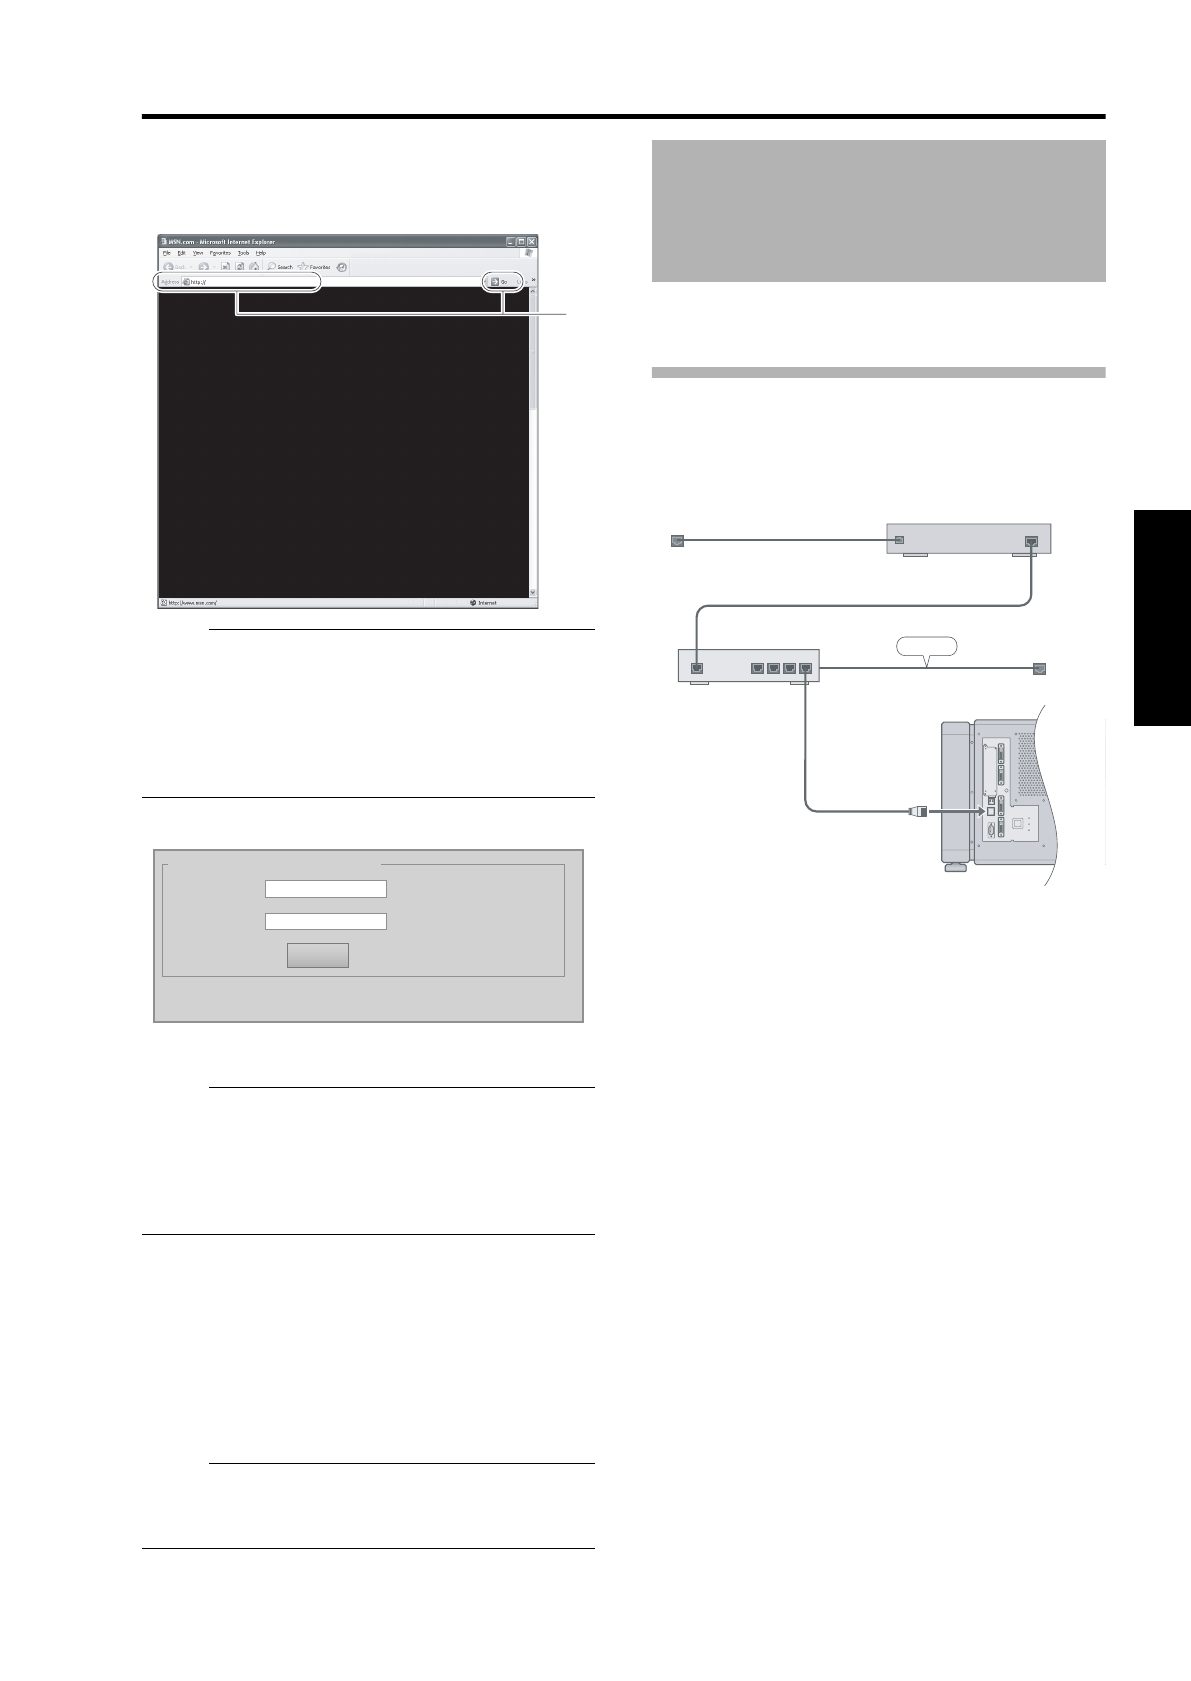
7 Enter the IP address assigned by the DHCP
server in the address field of the web
browser, and click AGoB
● A login screen for this projector appears.
NOTE:
● Refer to the client settings for the DHCP server to
obtain information on the IP address for this unit.
● If connection is unsuccessful, this may be due to
the network environment. For details, consult your
network administrator.
● If an error message appears, configure the IP
address manually. (A Page 21)
8 Enter ArootB in Login Name
9 Click ALOGINB
NOTE:
● You can alter the user name and password in the
ANetworkB menu. Specify a user name and
password of not more than eight single-byte
alphanumeric characters. (A Page 31)
● If you have forgotten the password, please consult
your authorized dealer.
Ⅵ When configuring the IP address manually or
connecting this projector to the computer
using a USB cable
● To configure the IP address of this projector manually,
connect this projector to the computer using a USB
cable to invoke the menu screen of the projector,
followed by configuring the IP address.
● You need to install a driver in order to connect the
projector and computer using a USB cable.
NOTE:
● For details on manual configuration of network
settings and installation of the USB driver, please
consult your authorized dealer.
This feature enables delivery of mail (error message) to
the preset e-mail address when error occurs inside this
projector unit.
Connection Example
7
Input Your Login Name & Password
Login Name root
Password
LOGIN
Using the Mail Delivery
Feature
CONTROL
DVI 3
USB
LAN
RS-232C
STANDBY/ON
LAMP
WARNING
DVI 4
DVI 1
DVI 2
LAN1
WAN
LAN2LAN3LAN4
OPERATE I/B
ETHER
To Internet Connection
To LAN Terminal
ADSL Modem ,etc
DHCP Server
LAN
DLA-SH4_EN.book Page 21 Tuesday, January 15, 2008 6:07 PM


