29
ENGLISH
• Using the Power On/Off Timer
Select the item you want to set in step 3 in “Setting the
Clock” (page 28) and follow the instructions below.
POWER-ON SET
You can activate/deactivate the Power-On Timer.
Press 2/3 to select “ON” or “OFF.”
ON: The Monitor automatically turns on at the time
set in “POWER-ON TIME.”
OFF: The Power-On Timer is deactivated.
POWER-ON TIME
You can adjust the time to turn on the Monitor.
Set the hour and minute following steps 4 to 6 in “Setting
the Clock” (page 28).
POWER-OFF SET
You can activate/deactivate the Power-Off Timer.
Press 2/3 to select “ON” or “OFF.”
ON: The Monitor automatically turns off at the time
set in “POWER-OFF TIME.”
OFF: The Power-Off Timer is deactivated.
POWER-OFF TIME
You can adjust the time to turn off the Monitor.
Set the hour and minute following steps 4 to 6 in “Setting
the Clock” (page 28).
Using the Pixel Shift Function
This function periodically shift the position (pixels) of the
displayed picture on the screen so that you can avoid the
screen from being burned in.
1
On the remote control:
Press MENU/EXIT while holding
VOLUME – to display the Setup Menu.
On the Monitor:
Press MENU while holding 2 to display
the Setup Menu.
2
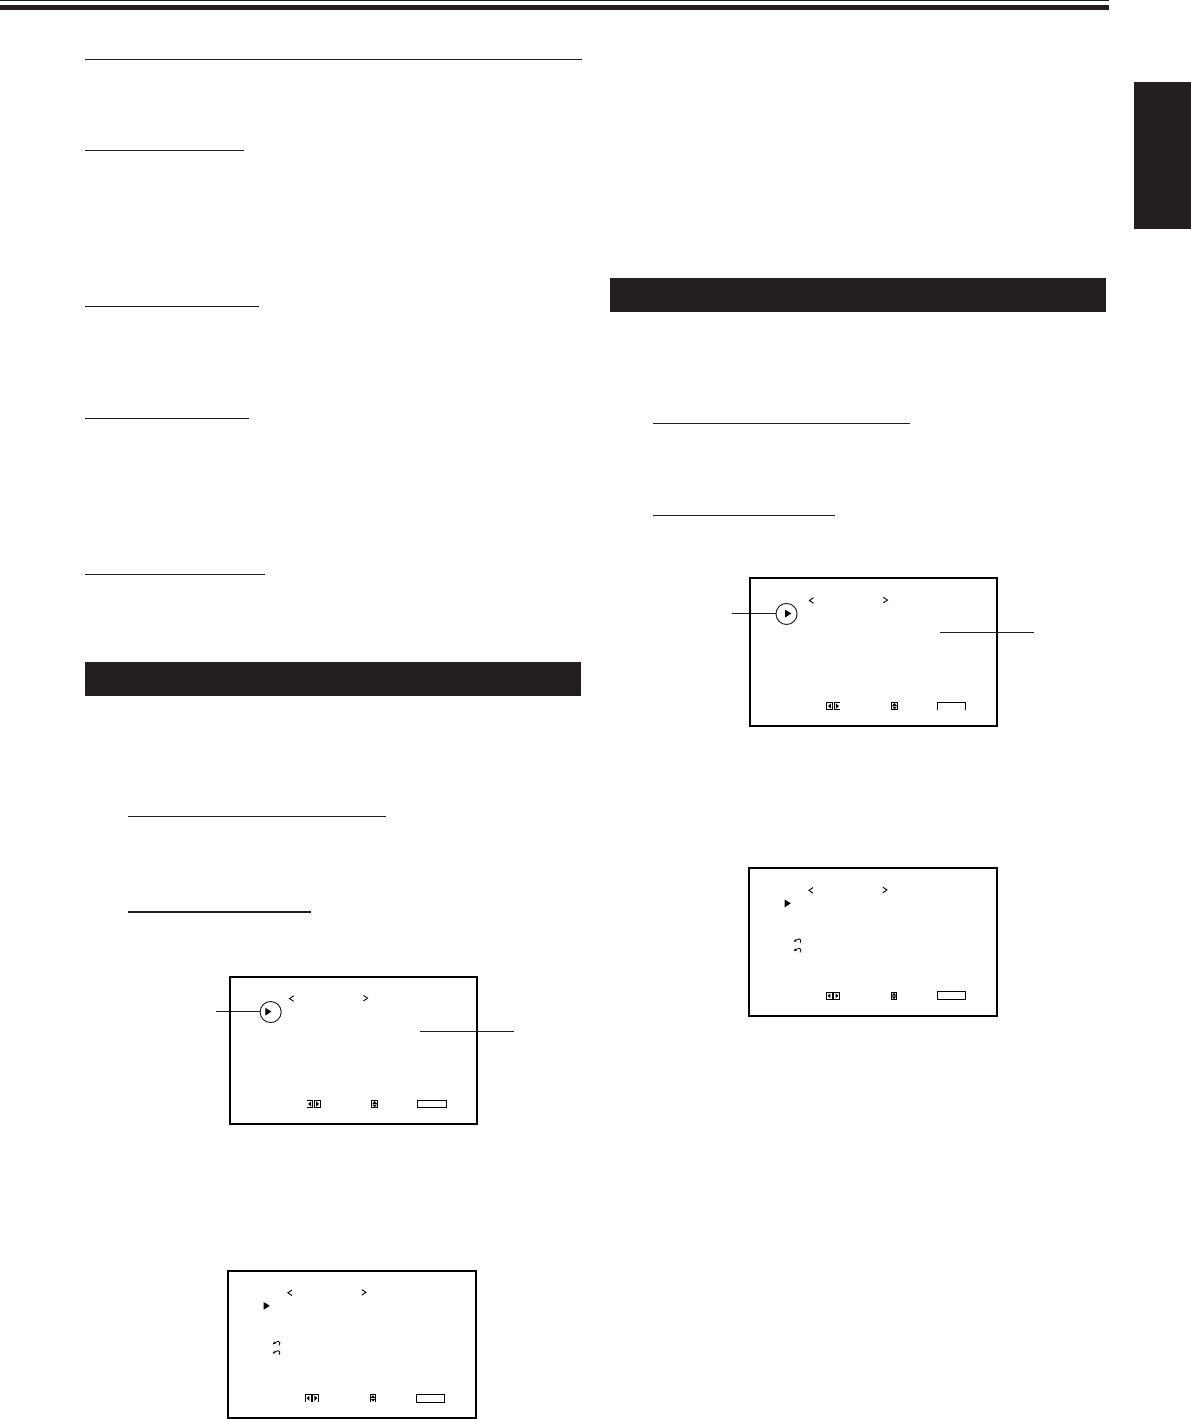
Press 5/∞ to move the cursor (3) to
“PIXEL SHIFT” (on the second page).
• The Setup Menu consists of two pages. If you keep
pressing 5/∞, you can move to the other page from
the current page.
Cursor (3)
3
Press 2/3 to select the desired setting.
Each time you press the button, the Pixel Shift function
alternates between “ON” and “OFF.”
To cancel the Pixel Shift function, select “OFF.”
4
Press MENU/EXIT (or MENU on the
Monitor) once to exit from the menu
operations.
Using the Power Save Function
You can use this function to reduce the electrical consumption
and to extend the lifetime of the Monitor’s screen.
• The brightness of the screen will be reduced.
1
On the remote control:
Press MENU/EXIT while holding
VOLUME – to display the Setup Menu.
On the Monitor:
Press MENU while holding 2 to display
the Setup Menu.
2
Press 5/∞ to move the cursor (3) to
“POWER SAVE” (on the second page).
• The Setup Menu consists of two pages. If you keep
pressing 5/∞, you can move to the other page from
the current page.
3
Press 2/3 to select the desired setting.
SAVE1: The screen gets dim.
SAVE2: The screen gets dimmer.
OFF: The Power Save function is deactivate.
To cancel the Power Save function, select “OFF.”
4
Press MENU/EXIT (or MENU on the
Monitor) once to exit from the menu
operations.
Cursor (3)
STATUS DISPLAY
CONTROL LOCK
REMOTE SWITCH
HD SIGNAL MODE
WHITE BALANCE
TIMER
SET-UP MENU 1/2
ADJUST:
SELECT:
EXIT:
MENU
: OFF
: OFF
: MODE1
: 1080i
PIXEL SHIFT
POWER SAVE
COLOR-REVERSE
REFRESH
reset
all reset
HOUR METER x100h
MODEL NAME
SET-UP MENU 2/2
ADJUST:
SELECT:
EXIT:
MENU
: OFF
: OFF
: 123
: GM-V42PCE
*
1
*
1
24_33_GM_V42[E].p65 03.6.23, 4:43 PM29


