17
ENGLISH
3
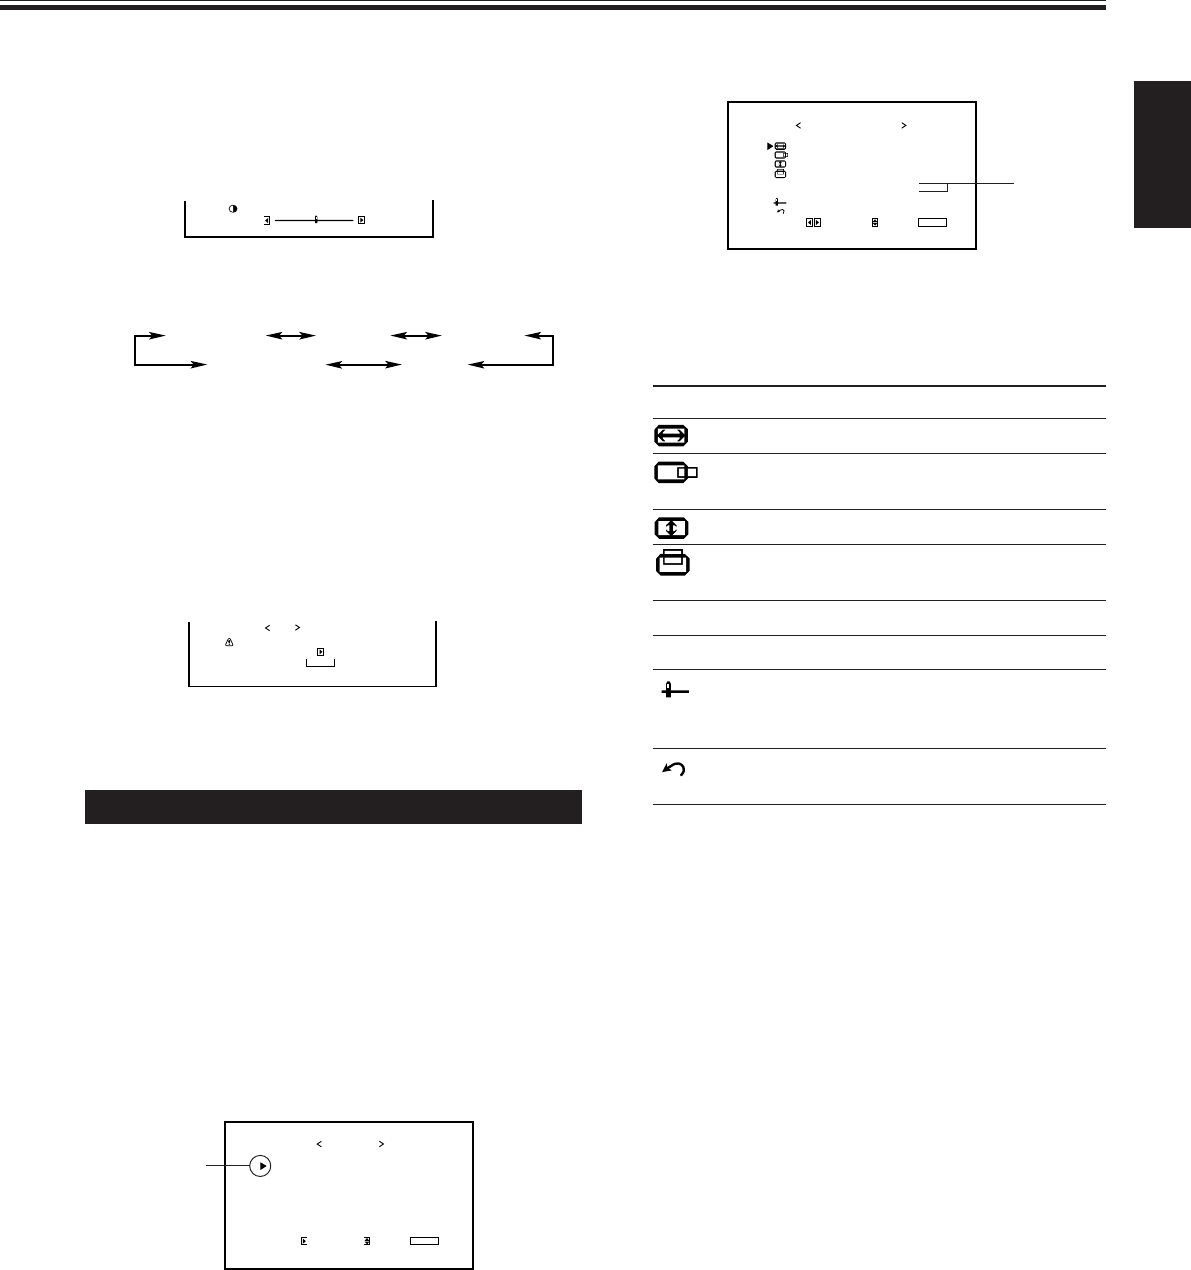
Press 3 to display the Size/Position
Adjustment Menu.
4
Press 5/∞ to move the cursor (3) to the
item you want to adjust.
Item Adjustment range
H (horizontal) SIZE*
1
–40 to +40
H POSITION*
1
Varies depending on other
settings
V (vertical) SIZE*
1
–40 to +40
V POSITION*
1
Varies depending on other
settings
DOT CLOCK*
2
–10 to +10
CLOCK PHASE*
2
–20 to +20
sub menu See “To make an adjustment
while viewing the adjustment
bar” on the next page.
reset See “To reset the adjustments” on
the next page.
*
1
Size and position adjustments are so related that if one
is adjusted much, the other’s adjustable range will be
reduced.
*
2
DOT CLOCK is the function to adjust the pixel
sampling number of the A/D converter to the
resolution (the vertical pixel number) of the input
signal.
CLOCK PHASE is the function to adjust the sampling
timing (phase) to the phase of the input signal.
You can use the two functions to reduce flickering and
blurring on the screen when using the RGB A or RGB
B input.
5
Press 2/3 to adjust the selected item.
Note:
• During size and position adjustments, the Monitor
screen may be distorted. This is normal, but not a
malfunction of the Monitor.
6
Press MENU/EXIT (or MENU on the
Monitor) twice to exit from the menu
operations.
Adjusting the Screen Size and Position
The screen size and position can be adjusted.
Adjusted settings can be stored for each signal type; therefore,
when the same signal comes in, the stored settings are
recalled.
• When adjusting the size, the size cannot be adjusted
proportionally, but can be enlarged rightward (or
downward) only and reduced leftward (or upward) only.
Therefore, it is necessary to adjust both the size and position
alternately to adjust to the appropriate size.
1
Press MENU/EXIT (or MENU on the
Monitor) to display the Main Menu.
2
Press 5/∞ to move the cursor (3) to
“SIZE/POSITION ADJ.”
To make an adjustment while viewing the adjustment
bar
After step 3 on page 16, proceed as follows:
1 Press 5/∞ to move the cursor (3) to “sub menu.”
2 Press 3 to display the Sub Menu.
The Sub Menu for CONTRAST appears on the screen.
3 Press 5/∞ to select the Sub Menu you want to adjust.
Each time you press the button, the Sub Menu changes as
follows:
4 Press 2/3 to adjust the selected item.
5 Repeat steps 3 and 4 to adjust the other items.
6 Press MENU/EXIT (or MENU on the Monitor) three times
to exit from the menu operations.
To reset the adjustments
After step 3 on page 16, proceed as follows:
1 Press 5/∞ to move the cursor (3) to “reset.”
2 Press 3.
The confirmation screen appears.
3 Press 3 again to reset the adjustments.
To cancel the reset, press MENU/EXIT (or MENU on the
Monitor).
CONTRAST BRIGHT
PHASESHARPNESS
CHROMA
Are you sure?
"YES"
then key.
"NO" then key.
MENU
reset
(To be continued on the next page)
PICTURE ADJ.
SIZE/POSITION ADJ.
FUNCTION SELECT
STATUS DISPLAY
ENTER:
MAIN MENU
SELECT:
EXIT:
MENU
Cursor (3)
H SIZE
H POSITION
V SIZE
V POSITION
DOT CLOCK
CLOCK PHASE
sub menu
reset
ADJUST:
SIZE/POSITION ADJ.
SELECT:
EXIT:
MENU
: +01
:
: –02
:
:
:
00
00
00
00
*
* Appearing and being adjustable only when you use RGB A or
RGB B input.
14_23_GM_V42[E].p65 03.6.23, 4:43 PM17


