


Networking Your Printer
13 www.kodak.com/go/aiosupport
On a computer with MAC OS:
1. Select Apple > System Preferences.
2. Under Hardware, select Print & Fax or Print & Scan.
3. Click + in the dialog box.
4. Select your printer from the list.
5. Click Add, if required.
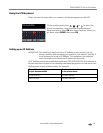
Adding a wireless network connection to a USB-connected computer
You can change the way you connect to your printer at any time.
Changing from USB to a wireless connection
To change the printer connection type from USB to a wireless (Wi-Fi) network:
If your printer is connected to a computer with WINDOWS OS:
1. Disconnect the USB cable from your printer and computer.
2. If you have not already done so, connect your printer to your wireless network.
See
Connecting to a wireless network, page 6.
3. On your computer, disable any firewall you have installed until you have
successfully completed the installation.
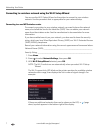
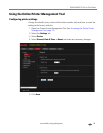
4. Select Start > All Programs > Kodak > KODAK Printer Setup Utility.
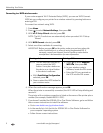
• If your wireless printer (example: KodakHERO5.1+1133) is not listed:
a. Select No, my printer is not listed, then click Next.
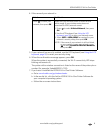
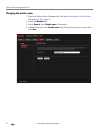
b. Select your printer from the list.
c. Select Network - Wireless/Wi-Fi, then click Next.
When your printer is detected, driver installation begins.
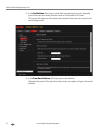
• If your wireless printer (example: KodakHERO5.1+1133) is listed:
a. Select the printer that is connected to your network.
b. Select Yes, my printer is listed, then click Next.
When your printer is detected, driver installation begins.
5. When driver installation is complete, click Done.
The printer with a wireless connection is listed as the name of the printer plus a
number (for example, KodakHERO5.1+1133).