


NJ750 Training Guide
4
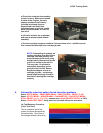
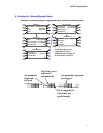
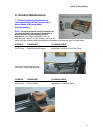
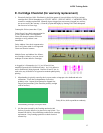
down a solid band of color with 33% ink load.
Color Test Failures:
- Example A above depicts
complete ink starvation in magenta.
This problem may be corrected by
using the EasyPrime and
establishing the required pressure
inside the cartridge. Replace
septum connector/needle if repeated
attempts continue to fail.
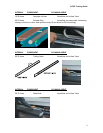
- Example B above depicts partial
ink starvation in magenta (ink fires
at 100% at the beginning of each
pass but then starves). This
problem can be corrected by
ensuring 19 ml of ink is present
inside the cartridge (level must be between 8 ml and 35 ml for proper operation – refer to
NOTE below).
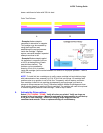
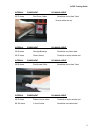
NOTE: To install ink into a cartridge or to verify proper cartridge ink level obtain syringe
with tube extension from accessory kit. Pull 20 ml of ink into syringe. Lift cartridge stall
position valve to up position to cut off ink flow. Temporarily remove septum connector
from cartridge. Install ink into cartridge by depressing syringe plunger; pull back on
plunger to remove excess ink (if any). Reconnect septum needle to cartridge and close
valve actuator (lower) to restore ink flow to cartridge. The cartridge will need to be primed
to restore negative pressure inside cartridge – refer to step 3 above.
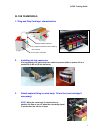
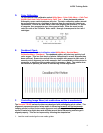
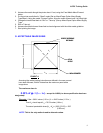
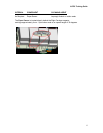
5. Activate the Prime pattern.
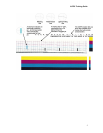
Select UTILITY MENU – PRIME. Verify all colors are printed. Verify no clogs are
present in the prime pattern. Manual or automatic jet compensation is provided up
to 20 jets in each cartridge. Ensure the integrity of the diagonal lines are
consistent and smooth. Clean or replace cartridge if unsatisfactory.