


25
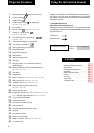
Loading and installing the slide tray
2.
3.
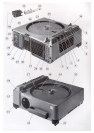
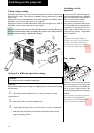
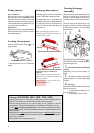
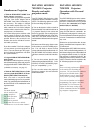
Projectors are often installed on racks where
tray installation may be difficult and only
possible from the rear of the projector. In
this case the tray positioning index mark
(27) on the back of the projector is very
helpful: The tray is properly set when the
index mark aligns with the mark placed on
the tray (at slide no. 20 of the 80 slide tray
and at slide no. 35 on the 140 slide tray).
Tray positioning index mark
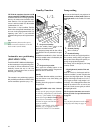
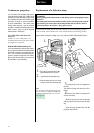
1. Check that the baseplate of the slide tray is locked
into zero-position and cannot be rotated.
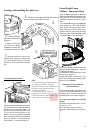
2. Load the slides up-
side down for normal front
projection.
. Replace and lock the
cover to prevent damage
and splitting in case the tray
is dropped or turned over.
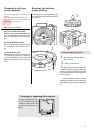
3. Place the loaded tray into its zero
position on the projectors transport ring
(15). The cleft in the slide tray (zero posi-
tion) fits on to the notch of the transport
ring.
Note:
To avoid annoying automatic refocus-
ing during presentation, damaged,
distorted or warped slides should not be
used as they may jam the projector`s
transport mechanism.
A slide tray index (80 slides) for
copying can be found on page 86. This
is ideal for archiving and an index copy
can be made for each slide tray.
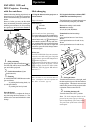
With the higher light ouput of the Extra
Bright Lamp Module the temperature in the
slide gate rises. To enable a smooth oper-
ation following hints should be consid-
ered:
1. Use only light respectively light gray
slide mounts (e.g. Wess slide mounts).
Slide mounts with only one dark side or
black side have to be sorted in respectively,
mounted with the side facing the lamp.
Please pay special attention when sorting
your slide mounts in rear projections:
Extra Bright Lamp
Module - Important Hints
2. Do not use a lamp type EXW/15 h for the
projector (higher temperature - lamp not
available from Kodak).
3. Consider the room temperature! It may
not exceed 35 degrees C!
4. High-Light-Mode (models 7010, 7020,
9010, 9020): Slide projection time per slide
may not exceed 1 minute!
If these hints are not considered,
mounts may deform!
5. Glass mounted slides can produce sweat
spots due to the high temperature in long
term projections. As soon as the slide has
warmed up these sweat spots disappear.
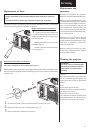
To reduce slide temperature (and light
output):
a) Install a heat-absorbing filter (see Ac-
cessories p. 35) or
b) Use the lamp economy switch, or
c) install a 200 h lamp (see Accessories p.
35)