Controlling the VP-419
5
6 Controlling the VP-419
The VP-419 can be controlled directly via the front panel buttons (see section 6.1)
and/or remotely from the infra-red remote control transmitter (see section 6.2)
6.1 Controlling via the Front Panel Buttons
The VP-419 includes the following control front panel buttons:
A Mode button (see section 6.1.1) and a Picture button (see section 6.1.2)
Arrow up () and arrow down () selector buttons
6.1.1 Using the Mode Button
Press the Mode button to enter and toggle through the OSD menu, which
is displayed on the video output, using the or buttons.
Table 3 defines the Mode button features and functions.
Table 3: The Mode Button Features and Functions
Mode Function
Source Select the desired input source: video, s-Video or component video
Resolution After selecting the output type, select between the RGB output resolutions (VGA,
SVGA, XGA or SXGA) or the YPbPr output resolutions (480p, 576p, 720p or 1080i)
Output Select a PC (RGB) output or an HDTV (YPbPr) output
Aspect Select between the standard aspect ratio (4:3) and the wide aspect ratio (16:9)
3D Enhance Turn the 3D comb filter function ON or OFF
1
Digital NR Turn the digital noise reduction function ON or OFF
6.1.2 Using the Picture Button
Use the Picture button to toggle through the picture adjustment parameters
and then use the or buttons to adjust the level. Table 4 defines the Picture
button functions.
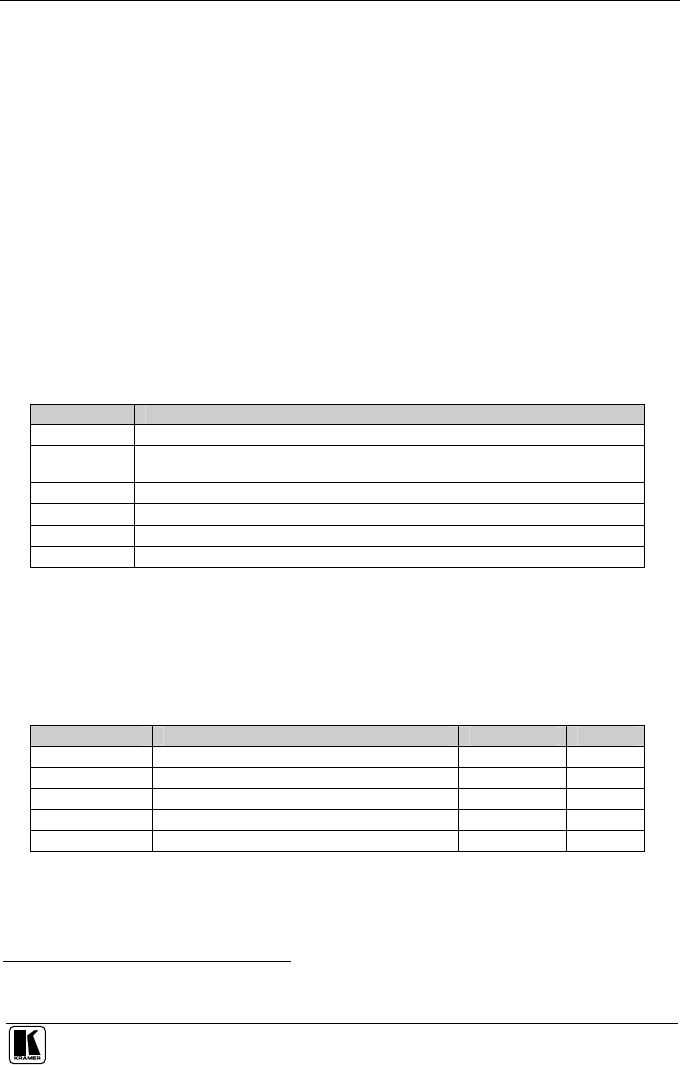
Table 4: The Picture Button Functions
Parameter Function Range Default
Contrast Adjust the contrast From 0 to 48 40
Bright Adjust the brightness From 0 to 48 24
Color Adjust the color From 0 to 48 24
Tint (NTSC only) Adjust the tint From 0 to 48 24
Sharpness Adjust the sharpness From 0 to 48 10
1 When a video player or a non-standard video source is connected to the output, the output picture may jitter. If this occurs,
turn the 3D Comb Filter to OFF


