


VP-81K - Connecting the VP-81K 19
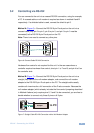
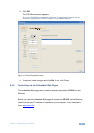
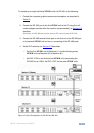
To cascade up to eight individual VP-81K units via RS-485, do the following:
1. Connect the computer graphics sources and acceptors, as described in
Section
5.
2. Connect the RS-232 port to the first VP-81K unit to the PC using the null-
modem adapter provided with the machine (recommended), as Section
5.2
describes.
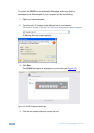
Alternatively, the RS-485 port could be used for PC control (instead of RS-232).
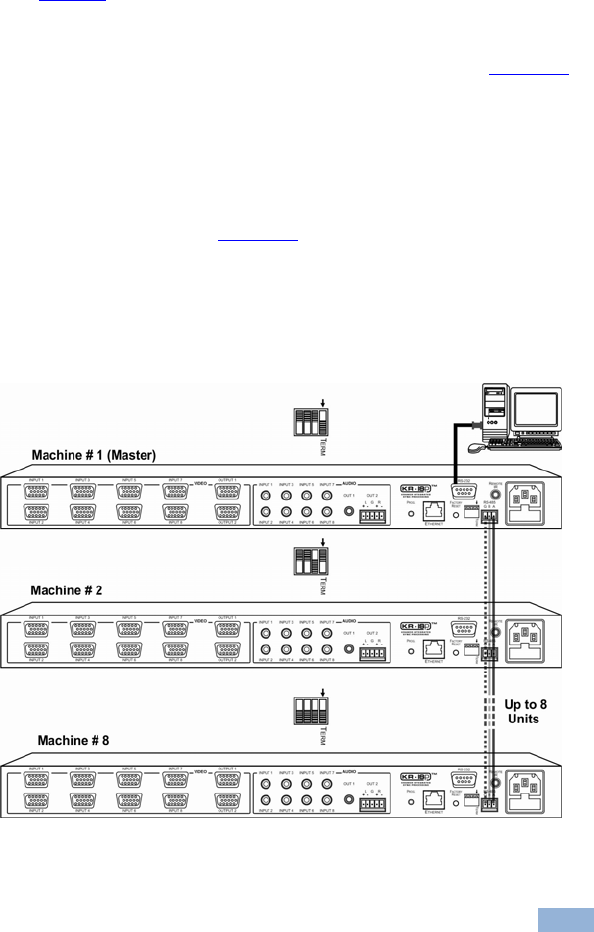
3. Connect the RS-485 terminal block port on the first unit to the RS-485 port
on the second VP-81K unit and so on, connecting all the RS-485 ports.
4. Set the DIP-switches, as Section
5.2 describes:
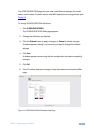
Set the first VP-81K unit as Machine # 1 and the following seven
VP-81K units as Machine # 2 to Machine # 8
Set DIP 4 ON on the first and last VP-81K units (terminating the
RS-485 line at 120Ω). Set DIP 4 OFF on the other VP-81K units
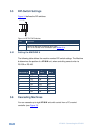
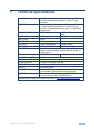
Figure 15: Control Configuration via RS-232 and RS-485