


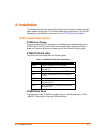

Installation
ETS Installation Guide 13
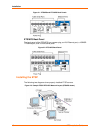
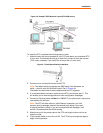
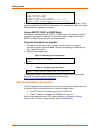
Figure 2-6. Sample ETSPR Network Layout (ETS16PR shown)
To install the ETS, complete the following steps in order:
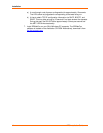
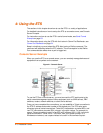
1. Attach the two rack mount brackets to your ETS and attach your bracketed ETS
to your rack. The brackets should go on both front corners or both rear corners.
(This is only necessary if you would like to mount the unit on a rack.)
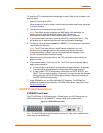
Figure 2-7. Rack Mount Bracket Installation
2. Connect one or more serial devices to the ETS.
Note: The default serial port settings are 9600 baud, 8 bit characters, no
parity, 1 stop bit, and Xon-Xoff flow control. See C:Pinouts for
information on what kinds of device attachments the ETS supports.
3. It is recommended to connect a terminal to the ETS console port (port 1). This
will enable you to receive diagnostic and initial configuration messages.
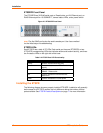
4. Connect an Ethernet cable to either the 10BASE-T port (shown) or a transceiver
connected to the AUI port.
Note: The ETS will boot without a valid Ethernet connection, but it will
pause to print a message (seen on the console port) asking if you want
to stop at the Boot> prompt. If you do not respond to this message, it will
wait for 10 seconds and then finish booting.
5. Attach one end of the power cable to the ETS and plug the other end into an
electrical outlet.
6. Flip the power switch to turn the unit ON. The ETS will go through two steps to
begin normal operation: