


TCP/IP Configuration LPR Printing
4-9
5 From the next dialog box, choose Remote Printing.
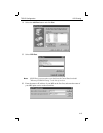
6 The Add a Standard Remote Print Queue dialog box will appear. Enter the fol-
lowing information.
❍ The name of the print queue,
❍ The name of the MPS unit,
❍ The name of the MPS service,
❍ The type of print spooler on the remote server, and
❍ A description of the printer on the remote server.
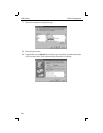
7 A dialog box will appear: “Added print queue mps_prt”. Click Done.
Note: If you are unable to use SMIT, see the Print Server Reference Manual
on the CD-ROM for UNIX commands used to set up print queues.
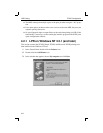
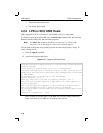
8 Print to the queue using normal lp syntax.
Figure 4-10: Printing to Queue
4.2.5 LPR on HP Hosts
The System Administration Manager (SAM) allows you to create print queues.
Note: If you are unable to use SAM, the Print Server Reference Manual lo-
cated on the CD-ROM describes UNIX commands that can be used to
set up print queues.
Note: Printer names on HP hosts are limited to 13 characters. The MPS text
service name will be too long, so you will have to rename the MPS.
To create a print queue:
1 At the HP prompt, type sam.
2 From the main application window, choose Printers and Plotters.
3 In the Printers and Plotters window, choose Printers/Plotters.
4 In the pull-down menu, select Remote Printer/Plotter from the Actions menu.
5 The Add Remote Printer window will appear. SAM will prompt you for:
❍ The printer name (the name of the print queue),
❍ The remote system name (the MPS name),
❍ The remote printer name (the MPS service),
% lp -dmps_prt filename