transactions pending in memory to the store file to ensure that the backup includes the most recent changes
available; after which, a snapshot of the files are backed up.
For Microsoft SQL Server to back up, the SQL Server VSS Writer service must be started before the backup set
displays. It is suggested that you set the SQL Server VSS Writer service to automatically start when Windows
starts. When the backup sets appear for Microsoft SQL Server, each database displays as a separate backup set.
After Lenovo Online Data Backup has backed up the file, only the changed blocks of the file are transmitted.
This happens at the block level, not the file level, so subsequent backups can take minutes instead of hours.
This style of Exchange and SQL Server backup results in a significantly reduced impact on the performance of
the server as well as on the SQL/Exchange services. Because Lenovo Online Data Backup avoids interfacing
with the services directly, no downtime or slowdown of any kind is experienced.
Editing Backup Sets
Editing a backup set takes just moments and is easy to accomplish.
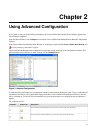
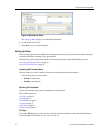
1. If the Lenovo Online Data Backup Status Window is not displayed, right-click the Lenovo Online Data
Backup icon in your system tray, then click Configure.
2. Choose from one of the choices:
• Double-click the backup set you want to edit.
• Right-click on your target set, then click Edit Backup Set.
3. Make any changes as required, then click Save. See Creating Custom Backup Sets on page 15 for additional
information on how to edit backup sets.
Using the File System Tab to Select Backup Content
The File System tab allows you to select or deselect any files or folders on your system to include with your
Lenovo Online Data Backup backup. This method differs from backup sets because instead of searching for a
file type, Lenovo Online Data Backup searches for individual files to back up.
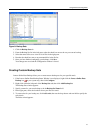
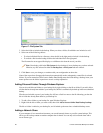
1. If the Lenovo Online Data Backup Status Window is not displayed, right-click the Lenovo Online Data
Backup icon in your system tray, then click Configure.
2. Click the File System tab.
The File System is displayed in the right pane.
19
Using Advanced Configuration


