


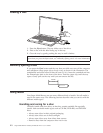


1. Insert a disc into the drive.
2. Double-click My Computer. Right-click the Multi-Burner drive letter.
3. Click Format. Formatting time will vary depending on the format process you
use (Quick or Full).
4. After formatting is complete, you can drag and drop files to the Multi-Burner
drive icon, or you can move files in Windows Explorer.
To
make CD-R media compatible in other computers:
1. Double-click My Computer. Right-click the Multi-Burner drive letter.
2. Click Make Compatible.
To
use UDF formatted DVD-RAM, DVD-RW, DVD+RW, or CD-RW media in other
computers, a UDF reader is included on the User’s Guide and Software Super CD. To
use the UDF reader, follow this procedure:
1. Insert the User’s Guide and Software Super CD into the CD or DVD drive of the
computer you want to use the UDF formatted discs with.
2. Click Start.
3. Click Run.
4. Type e:\UDF\language where e is the drive letter of the CD or DVD drive, and
language is your language.
5. Click OK.
6. Double-click SETUP.EXE and follow the on-screen instructions.
Note:
The UDF reader is only needed on systems that do not have another DLA
program for CD-RW, DVD+RW, or DVD-RW installed.
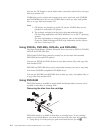
Using Intervideo WinDVD Creator Plus
With Intervideo WinDVD Creator Plus, you can capture, edit, and record video
and audio files. You can also use Intervideo WinDVD Creator Plus to create and
record DVD videos using your own video and audio files. Intervideo WinDVD
Creator Plus works with DVD-R, DVD+R, DVD-RW, DVD+RW, and DVD-RAM
media. For more detailed information on Intervideo’s WinDVD Creator Plus
features, go to the WinDVD Creator Plus User’s Guide on the User’s Guide and
Software Super CD.
The main function areas within the WinDVD Creator Plus main window are
“Capture,” “Edit,” “Author,” and “Make Movie”. From these functions, you can
import and edit your own video and audio files, then save them into any
supported format. The supported formats include MPEG-1, MPEG-2, ASF, WMV,
and AVI. When you have prepared your video and audio files, by going through
the “Capture” and “Edit” steps, you can then add a customized menu from within
the “Author” function. You can import your own still images to use as menu
backgrounds or select one of the sample images. When your movie is ready,
proceed to “Make Movie” where you can select the output format and video
standard used in creating your movie. Burn your movie to disc or save it to the
hard disk for burning later. If you use WinDVD Creator Plus to create a DVD
image on your hard disk, you can select “Load Image to Burn” from the Project
menu.
2-10 Super Multi-Burner Ultrabay Enhanced Drive: User’s Guide