For Windows users
1 Obtain a copy of the software installer package.
• From the Software and Documentation CD that came with your printer.
• From our Web site:
Go to
http://support.lexmark.com, and then navigate to:
SUPPORT & DOWNLOAD > select your printer > select your operating system
2 Double‑click the software installer package.
Wait for the installation dialog to appear.
If you are using the Software and Documentation CD and the installation dialog does not appear, then do the
following:
In Windows 8
From the Search charm, type run, and then navigate to:
Apps list > Run > type D:\setup.exe > OK
In Windows 7 or earlier
a
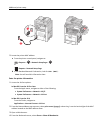
Click or click Start, and then click Run.
b In the Start Search or Run dialog, type D:\setup.exe.
c Press Enter or click OK.
Note: D is the letter of your CD or DVD drive.
3 Click Install, and then follow the instructions on the computer screen.
Note: To configure the printer using a static IP address, IPv6, or scripts, select Advanced Options >
Administrator Tools.
4 Select Ethernet connection, and then click Continue.
5 Attach the Ethernet cable when instructed to do so.
6 Select the printer from the list, and then click Continue.
Note: If the configured printer does not appear in the list, then click Modify Search.
7 Follow the instructions on the computer screen.
For Macintosh users
1 Allow the network DHCP server to assign an IP address to the printer.
2 Obtain the printer IP address either:
• From the printer control panel
• From the TCP/IP section in the Network/Ports menu
• By printing a network setup page or menu settings page, and then finding the TCP/IP section
Note: You will need the IP address if you are configuring access for computers on a different subnet than the printer.
3 Install the printer driver on the computer.
a Double‑click the installer package for the printer.
b Follow the instructions on the computer screen.
Additional printer setup 48


